Sunday, March 13, 2022

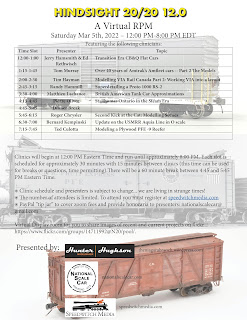
Clinic files for Modeling a Plywood-Sheathed PFE -9 Rebuild


Here are the links to the clinic files for Modeling a Plywood-Sheathed PFE -9 Rebuild presented at Hindsight 20/20 12.0 on March 5, 2022, both the .pdf file and the youtube link for the video.

Sunday, March 6, 2022

This is a simple one - screen material


The tea bag after being cut "open"

I have seen many modelers try to simulate the screens on the ventilator doors of ventilated box cars. They are a very difficult thing to replicate in HO scale. Screen material is just too fine. There are many scientific filter mesh materials that are good simulations. There is also an easier method. I found it while having a cup of tea from Bushwick Tea, although I am sure there are other options. The tea bag is comprised of an extremely fine mesh material that if added to the door of a ventilated box car (or in the window of a caboose) would do a fine job at simulating screen material. The mesh is see through yet definitely visible, creating the right illusion. Drink your tea!

Wednesday, February 23, 2022

Hindsight 20/20 12.0

 The next Hindsight 20/20 is coming on March 5, 2022. Details and registration via this link


Saturday, January 15, 2022

File from Clinic at Hindsight 20/20 11.0


I finally added the photo credits to the presentation file from Hindsight 20/20 11.0, PFE Early 1950s Fleet (the .pdf file may be accessed via the link.) The presentation may be viewed on youtube, as well, via this link.

Thursday, December 2, 2021

PFE Trust Plate


I am not normally a collector of railroadiana and such, but with an interest in PFE cars and freight cars, in general, this was something that struck me. The "buy it now" option on eBay was modest (relatively) and the seller offered a further discount after I had "watched" the item. So... I decided to treat myself. If you're not familiar with such things, you might inquire what exactly this thing is.

Many railroads financed equipment purchases via trusts. The trusts were effectively like bonds. The capital markets provided money to finance purchases, the railroads received their equipment, and the owners of these bonds ("certificates") received regular cash payments until the terms were satisfied. At that point, the railroad owned the equipment and the obligations under trust were satisfied. Once satisfied, the plate that designated that the car was owned as part of a trust could be removed as the railroad then owned the equipment outright.

Which brings us to this particular trust plate. The details of the trust are noted in the text from Moody's Analyses of Investments and Security Rating Service for Railroad Securities, 1925, Moody's Investor Service (digitized by Google Books.) The cars in question were 5,000 refrigerator cars for freight service and 300 refrigerator cars for use in express service via passenger trains. I do not have the relevant specifics for the freight reefers, but it is likely they were a mix of classes R-30-12 and -13. The express cars were those in the 500-799 series, built in 1923-1924. The plate does not have the specific information about which builder and series it was a part of, but it is a cool thing (to me) to have, both for its age (~98 years old at this writing) and because of my interest in Steam Era freight equipment.

Relevant text from Moody's

While this "investment" is purely a luxury, it will look nice adorning a spot on the wall in the room where I do my modeling.

P.S. for those who are curious, it measures 18 x 8 x approx. 3/8 inches and weighs about 25 pounds.

Tuesday, November 23, 2021

Baltimore & Ohio P-11 Flat Car


When I built my PRR FM class flat car (Part One and Part Two,) I alluded that I would follow up with a build of a B&O P-11 class flat car, a virtual clone of the Pennsy FM. That effort is presented here. While I used an F&C kit for the PRR FM, I modeled the B&O P-11 using a Sunshine kit I had on hand. The Sunshine kit is easier due to the stake pockets being integral to the "side" castings. However, the sides, ends, and underframe are separate parts, meaning the basic car body must be assembled. I did not find that difficult and given the choice, I preferred assembling the Sunshine car body over the one-piece F&C car body, since the F&C kit required the fiddly step of adding the individual stake pockets.

The Sunshine kit is older and suffers from a few inaccuracies that I corrected. They included converting the end sills to channel sections with the flanges facing outwards and replacing the bottom crossbearer cover plates. I added lead weights to this model and opted to forgo brake equipment. I also built a deck from scratch using strip styrene, which looks great, but led to a noticeable curving of the car body from end-to-end, that required a maddeningly difficult resolution.

The underbody casting with sides (but not ends) added

The "stock" end before modification

The "stock" end as viewed from above

The modified end with new push pole pockets, draft gear casting and webs added (trimmed on right and untrimmed on left)

I removed all detail from the ends and then created new details from scratch. This involved adding 0.005" styrene at the corners and around the draft gear (coupler) opening. I punched styrene discs that were added to the corners and then "dished" using a drill bit. The grey color is Mr. Surfacer 1200 added to create a softer, rounder look to the depressions. I added strip in several places to simulate the triangular webs around the push pole circles and the draft gear. These were trimmed to a triangular profile, as shown in the photo of the completed end.

The modified end in the same state as the photo directly above, but from a different angle, showing the castings (simulated with 0.005" styrene) wrapped around the corner

The end after detailing, including top and bottom flanges of the channel end sills, simulated with 0.005" styrene strips plus rivets, grab irons, uncoupling devices, and angle cock/air hoses. The sill steps are also visible

Detailing followed my typical process. Grabs were bent from 0.010" wire while the uncoupling rods are 0.012" wire with Yarmouth etched eye bolts. The grab attachments are tiny discs punched from 0.005: styrene with rivets added. Those rivets, as well as the ones at the corners, were harvested from an Athearn snowplow shell. Angle cock/air hose parts are by Hi-Tech. The sill steps are etched parts from Yarmouth.

The route card boards were fashioned from styrene strip with a "frame" of 0.005" styrene. The first deck boards are visible, as well

This photo illustrates the addition of the first deck boards, working from the car center toward the ends

The deck was fashioned from individual styrene 0.030" x 0.080" styrene strips. The individual boards were sanded a bit, to create a bit of texture. They were notched in appropriate locations to fit around the stake pockets.

A view of the almost completed deck and stake pocket openings

A similar view, but of the entire car

The model after detailing was completed, ready for blasting and painting

The story has a bit of a muddled finish. I painted, lettered and weathered the model, only to see the curve in the top of the deck become more pronounced over time, resulting in an unrealistic dip in the center of the car. I used almost boiling water to straighten things out to an acceptable degree, but the ancillary result was that the finish of the model was ruined. I have to remove the lettering and repaint the sides and re-decal and then weather the car again. To be continued... sigh

Monday, November 22, 2021