There were no instructions, parts (including the simulated wood floor casting), decals, trucks, etc. Fortunately, I have one of these kits in my stash and could use it to help complete the model.
Additional details include:
- Yarmouth Model Works Carmer cut levers
- Perfect hand brake wheel (Dayton Malleable Iron Co.) from alternate Westerfield Reading gon kit (which includes an extra, fortuitously!)
- Custom decals from my artwork, printed by PDC
- Plate C Taylor trucks (they are 50-ton whereas the prototype used 70-ton, they they are a unique design and 70-ton versions are not available; more on these trucks below)
- Lead sheet and styrene
- Stripwood (1x8) for the floor
- Weathered predominantly with artists' oils plus limited powders from PanPastel and Bragdon
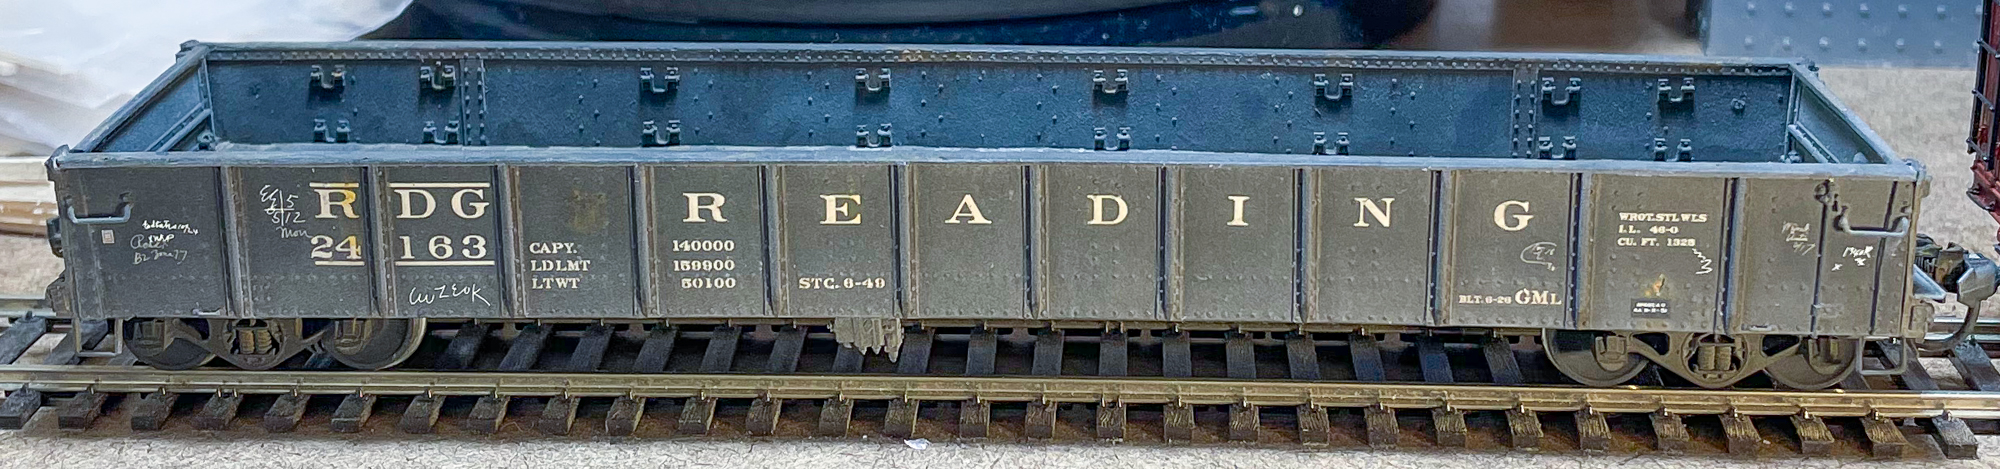
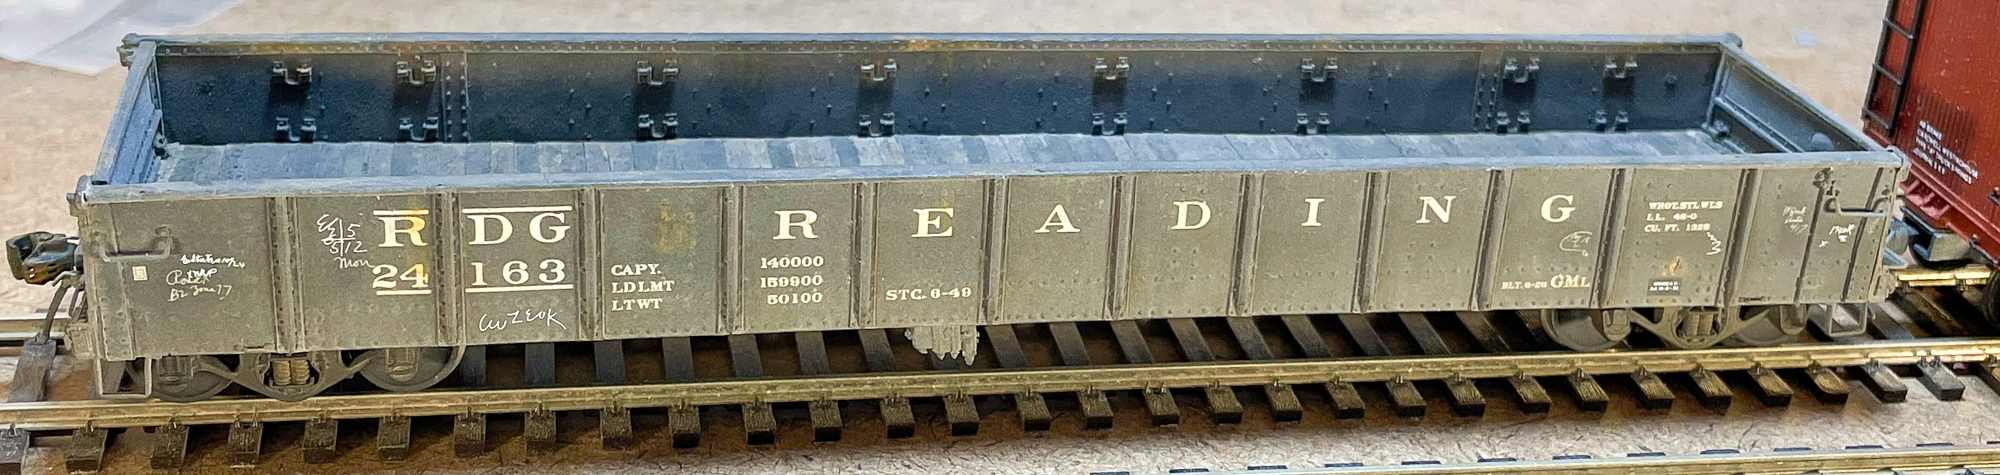
The model was mostly completed. Prior to painting, I added some missing details as well as a couple other items. I began by adding lead sheet at the ends of the floor and some styrene in the center. The lead sheet is quite thin, ~0.020", so I used 0.020" sheet styrene in the center section. Bill had already added lead sheet between the structural members on the bottom of the car so the additional lead made the car sufficiently heavy to run without a load. I added small amounts of strip styrene and rivets to simulate the mounting of the sill steps.
 |
| Images of the Plate C Taylor trucks, above and below |

A note is in order about the Plate C trucks. They are quite well detailed, but require some care in handling. They come assembled and should be handled that way. I removed the wheelsets and painted them in a wheel mask jig. That worked well, but in reinserting the wheelsets into the truck sideframes, I broke one. The truck sideframes are quite brittle. It would have been better to mask the wheel treads and leave the wheelsets in the sideframes. I did manage to repair the sideframe as the break was clean and I braced it as well. I used Barge cement to glue it back together and then "framed" the break with styrene attached with Barge cement secured additionally with ACC.
After all the detailing was completed, I blasted the metal/wire parts, trucks, and wheelsets with 220 grit aluminum oxide. This adds some roughness to improve paint adhesion. I primed the model using Badger Stynylrez primer. I then painted all surfaces with a mix of Tamiya flat black (~90%) and XF-66 light grey (~10%) using an airbrush. This was followed by a coat of Future floor polish again applied with an airbrush to create a gloss surface for the decals.


I applied all decals except the brake test and repack stencils. In addition, I added a few chalkmarks, too. These were sealed first with Future and then Tamiya XF-86 clear flat, both applied with an airbrush. I began weathering by applying a rust color that is a mix of gold ochre and terra rosa artists's oils. The technique involved using mineral spirits (odorless) to allow the color to "bleed" into various areas, including along the structural members on the sides, as well as the end sills. I also added less diluted rust to many areas, including several of the interior stake pockets and some "pits" (imperfections) in the car body casting to simulate rust. I sealed all of this with another flat coat followed by a thorough application of a light grey from a blend of white and Payne's grey artists' oils. This was applied to all surfaces, but more was added along the side sill and allowed to "travel" up the sides and structural members through capillary action. I again sealed this with a clear flat coat. I followed with another similar application, except this time with raw umber artists' oil, followed again with clear flat.


Since the floor casting was missing, I decided to add strip basswood to simulate the floorboards. I used HO scale 1x8; I don't know the dimensions of the prototype's boards, but I wanted them to be as thin as possible since I added lead and the width of 8" is dimensionally close to 7+ inches, a common board width on gons and flat cars. I secured the boards using a 50/50 mix of Barge cement and MEK. I began at the center of the car and added boards, working from the center to the ends. Once in place, I applied a basic wash to the boards of diluted raw umber artists' oils thinned with mineral spirits. I sealed everything with a flat coat before proceeding.


Next, I highlighted several of the boards with raw umber and Payne's grey artists' oil washes of various strength to create subtle differences in the boards, followed by a clear flat coat. I followed with some judicious applications of PanPastels and Bragdon's powders. The PanPastels (Payne's grey) were applied to the floor boards as well as to slightly darken the chalkmarks. I also added Payne's grey and raw umber to the truck sideframes, the wheelsets, and the couplers. The Bragdon's powders were added to the interior (not the boards) - grimy grey - and the faces of the wheelsets - soot. Everything was again sealed with a coat of Tamiya flat.


Wow! Your work to finish the model is amazing. I love the wood floor. I think of Bill every time I build a model now, especially when I add extra details.
ReplyDeleteI'm sorry to hear of the flood at Bill's place. I can hardly imagine the damage and the effort needed to clean out the space.
Thanks for the feedback on the model. It was fun to finish it
DeleteGreat model! Which kit is this based on?
ReplyDeleteIt is a Westerfield kit... link is here: https://id18538.securedata.net/westerfieldmodels.com/merchantmanager/index.php?cPath=102_322
Deleteand thanks for the kind feedback too
DeleteWow ,great work by both of you. That’s an impressive piece of work. I learned three things I didn’t know from your little blog here. Keep up the GREAT work
ReplyDelete