Showing posts with label Funaro & Camerlengo. Show all posts

Friday, March 8, 2024

Finishing the PRR G22 Gondola


"Brooklyn Car & Foundry" builder's photo of PRR 810328


Picking up where I left off on this build, I added some detail that I felt was best applied after the model had been blasted with aluminum oxide. I added rivets to the side in the locations shown in the photo above. They were harvested from an undecorated Athearn snow plow shell.


The rivets that I applied to the lower crossbearer cover plates are decals from Railtec transfers. While they are white (and perhaps harder to discern,) they are the best shaped rivets on the market.


I am adding a structural steel girder load to the interior. It will be secured in the stake pockets inside the car body. I removed the cast portions, as shown, and added wire to simulate the pockets. The wire was installed in holes drilled into the inside of the side, being careful to NOT drill through to the outer faces of the sides. I formed the wire using simple beading pliers to create the 'U' shapes and secured with ACC. The rivets on the corners were harvested from an undecorated Athearn snow plow shell.


I primed the model with Badger Stynylrez grey primer. It's a fine acrylic primer that I applied by airbrush. I then painted the entire car body, as well as trucks and wheelsets, with Mig Ammo "Red Brown Light" [A. MIG-0914,] which is a nice representation of a slightly faded PRR oxide freight car color. It dried to what I would describe as a "satinish" finish. I sprayed a coat of Quick Shine to create a gloss surface for decaling, again using an airbrush. I applied the decals as shown, including some chalk marks. Both the G22 decals and the chalk marks are National Scale Car offerings. I did omit the reweigh, repack, and brake test data off, as those were applied after some weathering, as the following photos illustrate.


To weather the car, I went exclusively with oils diluted with odorless mineral spirirts. I added some diluted burnt sienna along the bottom of the side sill that was drawn up a little on the surface of the side through capillary action. I also did an overall wash of Payne's grey and a little undiluted paint dabbed in a few places softened and blended by mineral spirits to create some darker areas. 


The reweigh (P50 9-49,) repack, and brake test stencils were all added at various stages of the weathering to appear "newer" than the other stencils. 


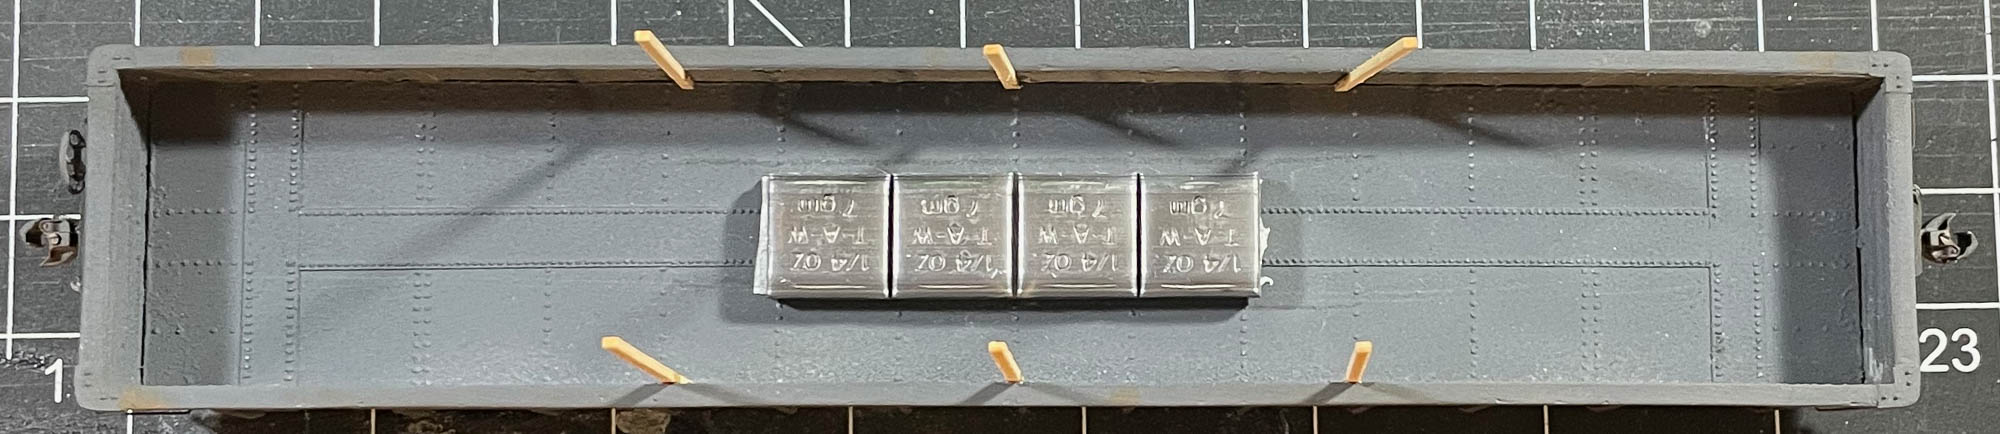
The interior was weathered, although it is mostly unfinished as the load will obscure most of the detail. I will create a separate post covering the load that will be published in the coming week or so. You can see the four stake pockets that were created from wire that will serve to secure the load. 


These Funaro & Camerlengo kits "assemble" (there's not a lot to assemble with these... it's more just adding details) into nice representations of the G22. For those who can wait, the Rapido cars should be available in the not too distant future.


Monday, January 16, 2023

Part One of the T&NO Emergency Gondola Model


Awhile back I posted some prototype info about the Texas & New Orleans Emergency design gondolas. I have done a little work on the model and want to share that info here. I haven't done a ton so if you're inclined to join, it should be easy to catch up.

I mentioned that my plan is/was to use the Improved Dreadnaught ends from Detail Associates to model one of the later cars equipped with Scullin L-V trucks, to afford an opportunity to use the trucks offered by Plate C. Here is where things are at with the model. 

To my eye, the area where the corner of the ends overlaps the sides would lack a little depth if I simply glued the ends to the sides. I compensated by adding 0.020" styrene strip, as shown in the two photos above. I believe it's 0.020" x 0.040", although I honestly can't recall for certain.

I then tacked the two resin sides back -to-back using ACC in a few spots, taking care to align them. I used a NorthWest Short Line True Sander to remove material and in the process making the sides exactly the same length and squaring up the edges. After that, I carefully popped the sides apart and glued one side to one end and repeating for the other side/end pair, as shown in the photo directly above.

Next, I glued the two remaining side/end joints and laid the assembled body upside down on my work surface to ensure that everything remained square and that I had not introduced any unintended bowing or torque into the body.

I again used the NorthWest Short Line True Sander to square the ends of the floor casting, removing material, as well, until the casting fit snugly inside the car body, end-to-end. I did add 0.010" styrene strip to both sides of the casting as it was slightly too narrow when test-fitted into the car body. Once everything was square and the fit inside the car body was tight, but not overly so, I tacked everything in place with ACC. I followed this by carefully dripping more ACC inside the car body at the floor/side and floor/end joints and then tilting the car body to allow the ACC to "run" and fill in the joints completely. In the view above, you will note that the crossmembers do not extend all the way to meet the bottom of the car sides. I will add some strip to rectify this. Below are a couple additional photos illustrating the application of the Detail Associates styrene ends to the resin body. More in the coming weeks...


Monday, January 9, 2023

McKeesport Connecting Gondola finale


Side view of the finished model

I recently finished my Funaro & Camerlengo model of a McKeesport Connecting Railroad 50' gondola. The big hurdle was completing the load. Below, I will chronicle how I secured it into the car body. For the previous posts on the model, please visit these links: Part 1, Part 2, Part 3.

First, I will briefly touch on the painting and weathering. The specs for this group of cars called for Scully #320 black graphite for the paint. I opted for a dark (but not close to black) grey to simulate this. Even heavily weathered the car appears grey and not black, the desired outcome. I also created a separate decal for the Pratt & Lambert "Vitralex" red circle in the emblem. The rest of the decals, except the reweigh and repack stencils, are from Jack Consoli's custom lettering for these cars. I sealed everything with Tamiya flat and applied several alternating coats of weathering and chalkmarks using PanPastels. The rust streaks were created using artist's oils thinned with mineral spirits. I dabbed the rust color on the side and then thinned and streaked it using the mineral spirits. 

I finished the weathering by adding PRR freight car oxide patches along with reweigh and repack stencils from a Speedwitch PRR set. I also added some fairly fresh chalkmarks at this step, as well, and sealed everything with a final Tamiya flat coat.


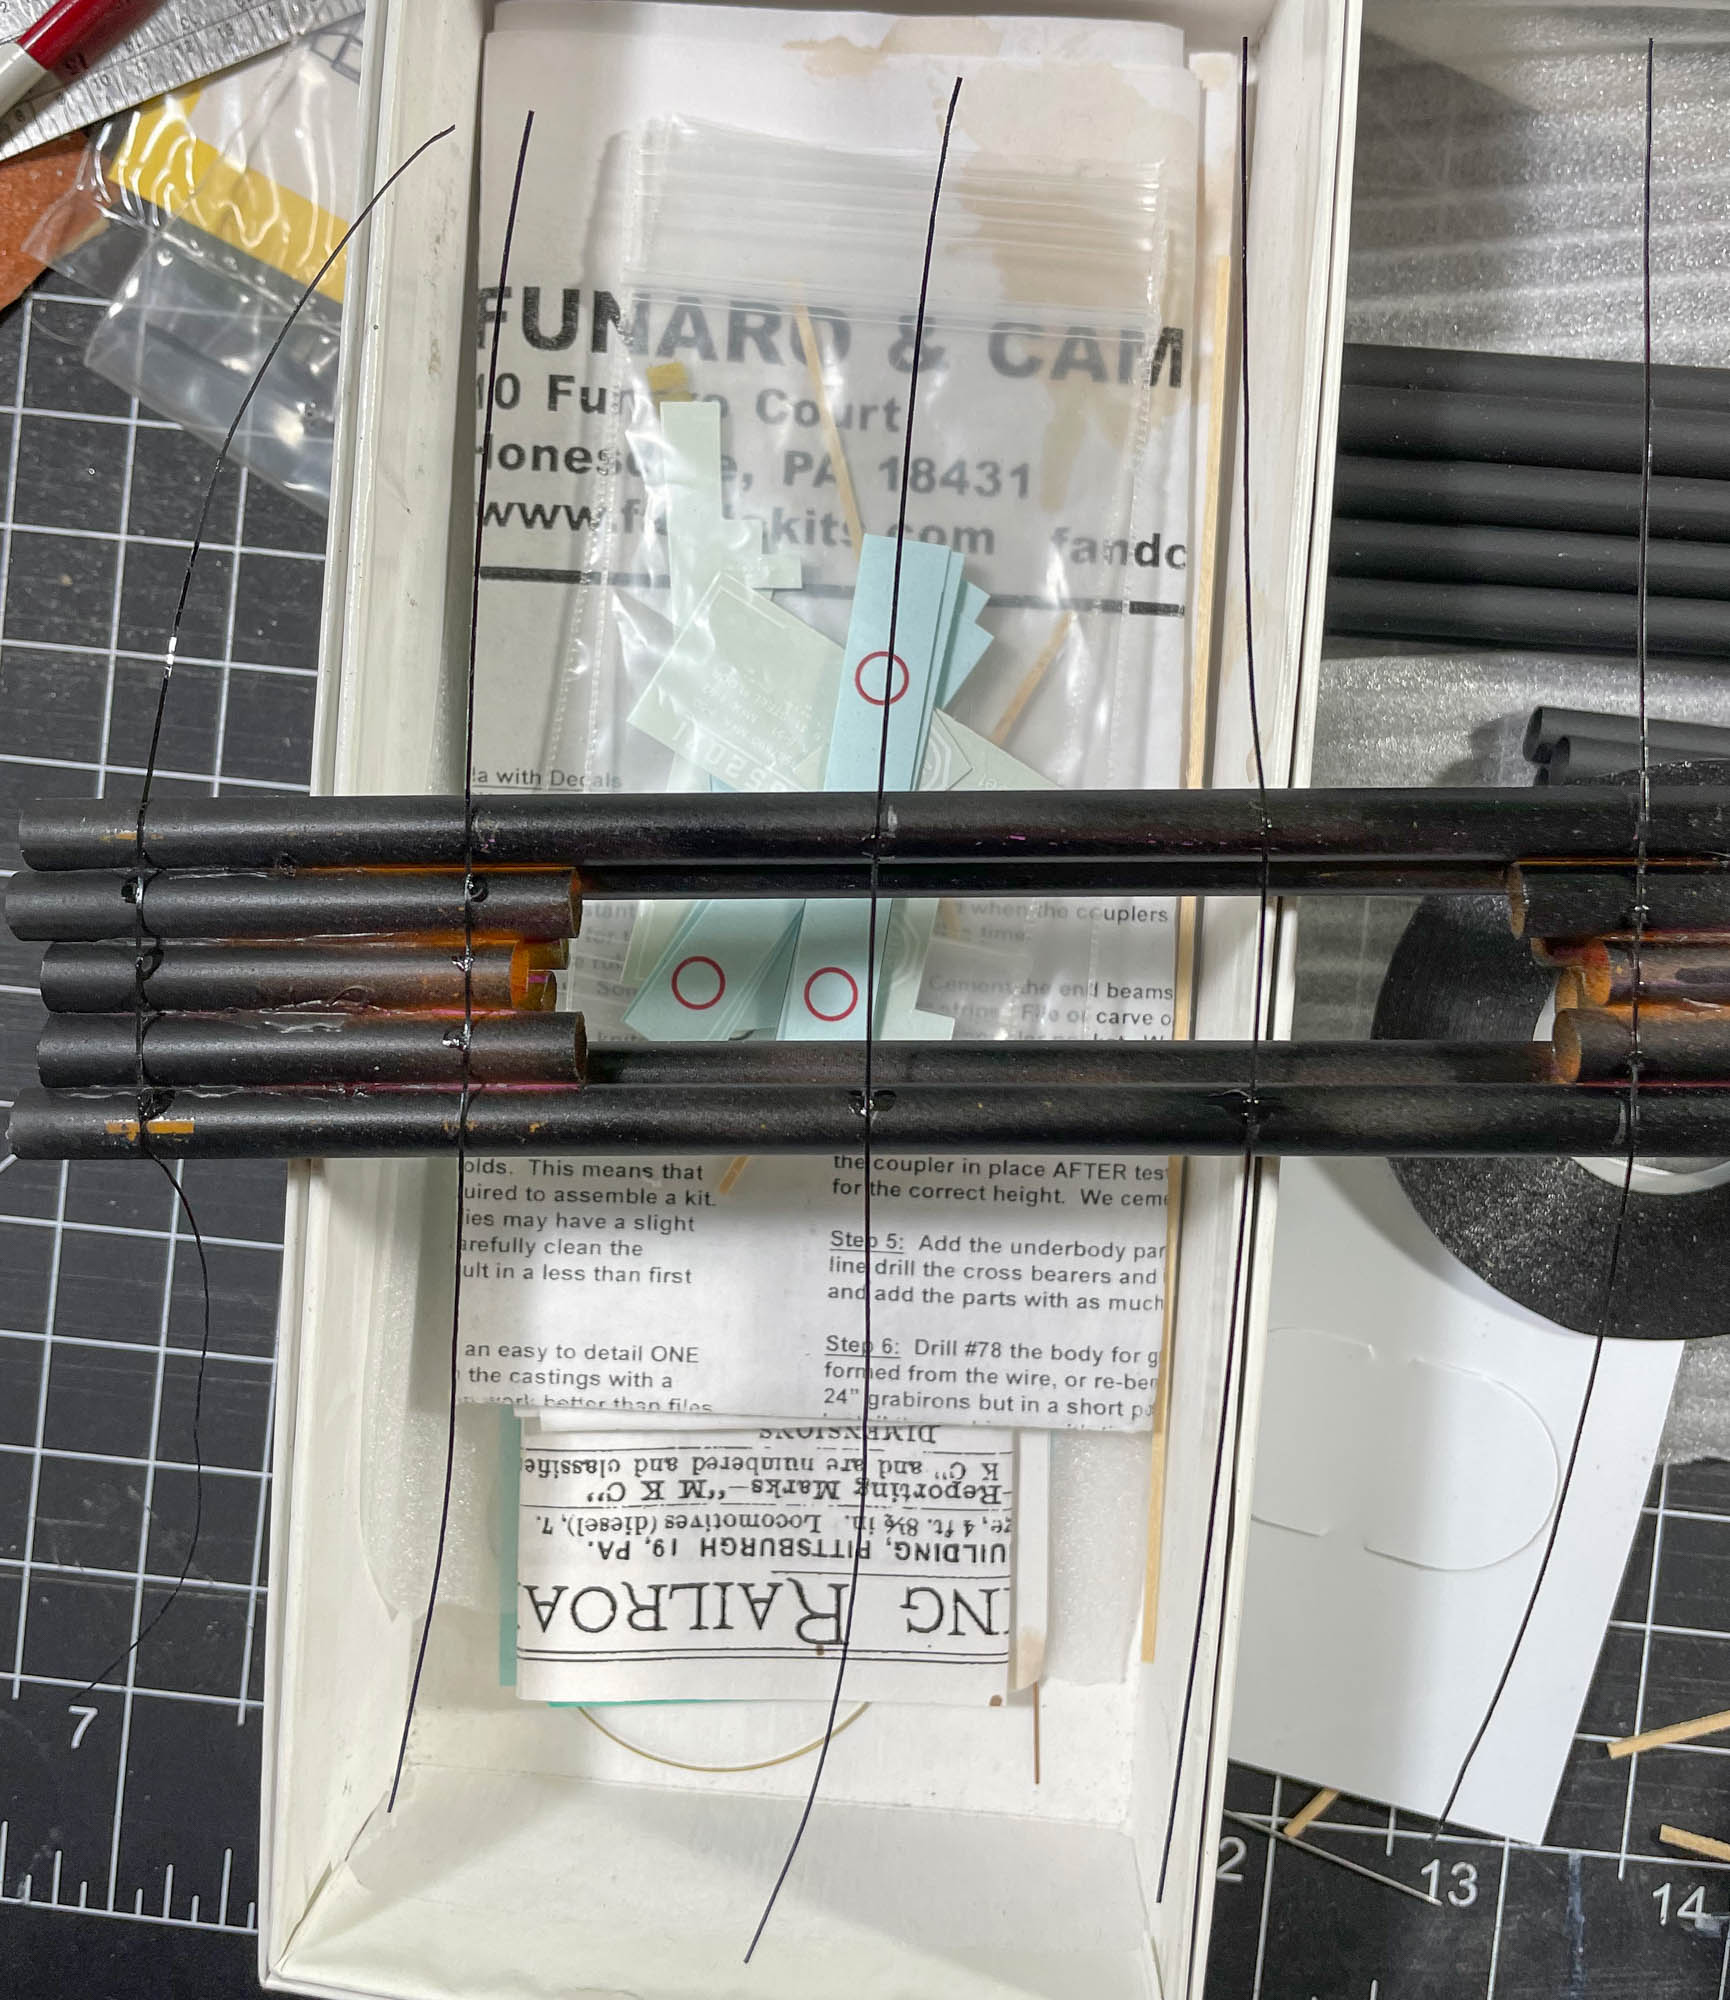
To secure the load, I began by adding the appropriate (for me) amount of weight (I tend to have my cars [consistently] lighter than NMRA standards, with the consistency being key... I am creating a fairly flat switching layout and the weights work well for my needs.) As shown above, I used self-adhesive lead tire weights, being careful to ensure that the bottom layer of pipe (drinking straws) would fit into the car body with no impingements, as shown below. I also added the first three sets of wood stakes to be used to contain the load and for tying together each level of pipe with wire (black thread.) The wood is technically supposed to be at least 4" x 4". However, the inside width of the model plus the thickness of the wood strips limited me to 2" x 4" pieces. It's not all that noticeable and is a concession I can stomach. I glued the strips against the inner face of the sides using a 50/50 mix of Goo and MEK to tack them in place followed by some ACC. The combination is secure with some measure of flex.


I carefully wedged the pipes in between the wood stakes to again ensure all fit as intended. Once satisfied, I removed the bottom pipe layer.


I carefully added Chartpack tape in six places, as shown above, with long strips left flopped over. This was a necessity as each layer of pipe had to be tied together with wire (string).


Once I had the Chartpack tape secure, I re-inserted the bottom layer of pipe and added the end pieces of wood strip, again secured with Goo/MEK and ACC. I also added the first pieces of thread to simulate twisted wire. These were added to each wood stake and then glued to some part of the pipes. Since this part of the "wire" is invisible, attention to detail is not paramount. The "wire" is actually number 50 black thread. It is quite old and has been kicking around my modeling supplies for years.


This photo provides a tighter view of the thread. The second pipe layer was added in an identical fashion, again gluing it to the pipe to secure in place.


With the top layer added, I could complete the Chartpack "bands" and wire. The bands were carefully pulled taught and attached to each other in the top and the center of the load. I created "clips" from 0.001" sheet brass. These served two purposes: to simulate the clips used to secure bands on the prototype and also to provide a place where the Chartpack tape could be secured and glued with ACC. I believe that the bands on the prototype were likely a Signode product (I used Signode to band crates when I worked summers at a machine shop as a teenager.) The metal straps had a piece of metal crimped over the spot where the straps overlapped in order to secure them. I painted these "clips" made from brass with a non-descript grey. 

Since the top layer is visible, the simulated wire must appear to be one uniform arrangement across the top of the load at each set of wood stakes. In my hands, I carefully twisted thread around and used sparing amounts of ACC to hold the twisted shape in place. Once that had set, I looped the end over a stake. Then, using two sets of tweezers, I made several twists in the other end, with the thread already looped around the stake. This was accomplished by holding the thread with one set of tweezers and using the other to go "over-under" many times and then securing that with sparing amounts of ACC until the twists held firm. I repeated that for each set of stakes. Once finished, I carefully trimmed the excess thread and was done! The load is quite secure inside the car body and I am happy with the results. The one thing I will watch over time is the glossy face of the Chartpack tape. If I find it objectionable or unrealistic, I will go back and flatten it some.

Tuesday, August 23, 2022

Texas & New Orleans Emergency Design Gondolas


Merrilees Collection, National Archives of Canada, Neg. no. PA204100

From 1944 to 1951, the Texas & New Orleans added 3,100 gondolas that were based upon the Emergency de- sign 50-ton gondola, substituting wood in place of steel to conserve precious plate steel during the war. However, the T&NO continued to purchase gons that were of composite design even after the restrictions on plate steel were lifted. The cars were assigned to four classes. The data is presented in the accompanying table. 

In 1959, the T&NO began to replace the wood sheathing with plate steel. About half of the cars were converted. When so modified, the class number was amended to include an ‘A’ after the original class number, e.g. G-50-19 became G-50-19-A.

For more information, consult Southern Pacific Freight Cars, Volume 1: Gondolas and Stock Cars, by Anthony W. Thompson, Signature Press, 2002.

Bob's Photo

Jim Gerstley

Why am I presenting this information, beyond its prototype importance? As an SP modeler, I am a T&NO modeler to a certain degree, as well. This is a ubiquitous gon, T&NO or not and Funaro & Camerlengo has produced a nice resin kit for the Emergency gon. Therefore, it's a good fit for me. That said, I intend to modify the kit to accept Detail Associates ends, which are an appropriate end for many of the prototypes, plus use the Scullin L-V trucks from Plate C that were used on T&NO nos. 46300-46549 (250 cars, G-50-21) and 48000-48499 (500 cars, G-50-24) and the National Scale Car decals. The next post will begin chronicling the build. Stay tuned

Sunday, May 15, 2022

Update on McKeesport Connecting Railroad Gondola

I was combing through Adobe Lightroom looking at photos as I worked on the McKeesport Connecting Railroad gondola (first and second posts linked) when I realized I never posted these images. The model is now painted and decaled and I am working on the load and weathering. I will post that info soon, but I thought I would share this interim update. The main image (above) shows the car after I had sandblasted it, but prior to priming and painting.

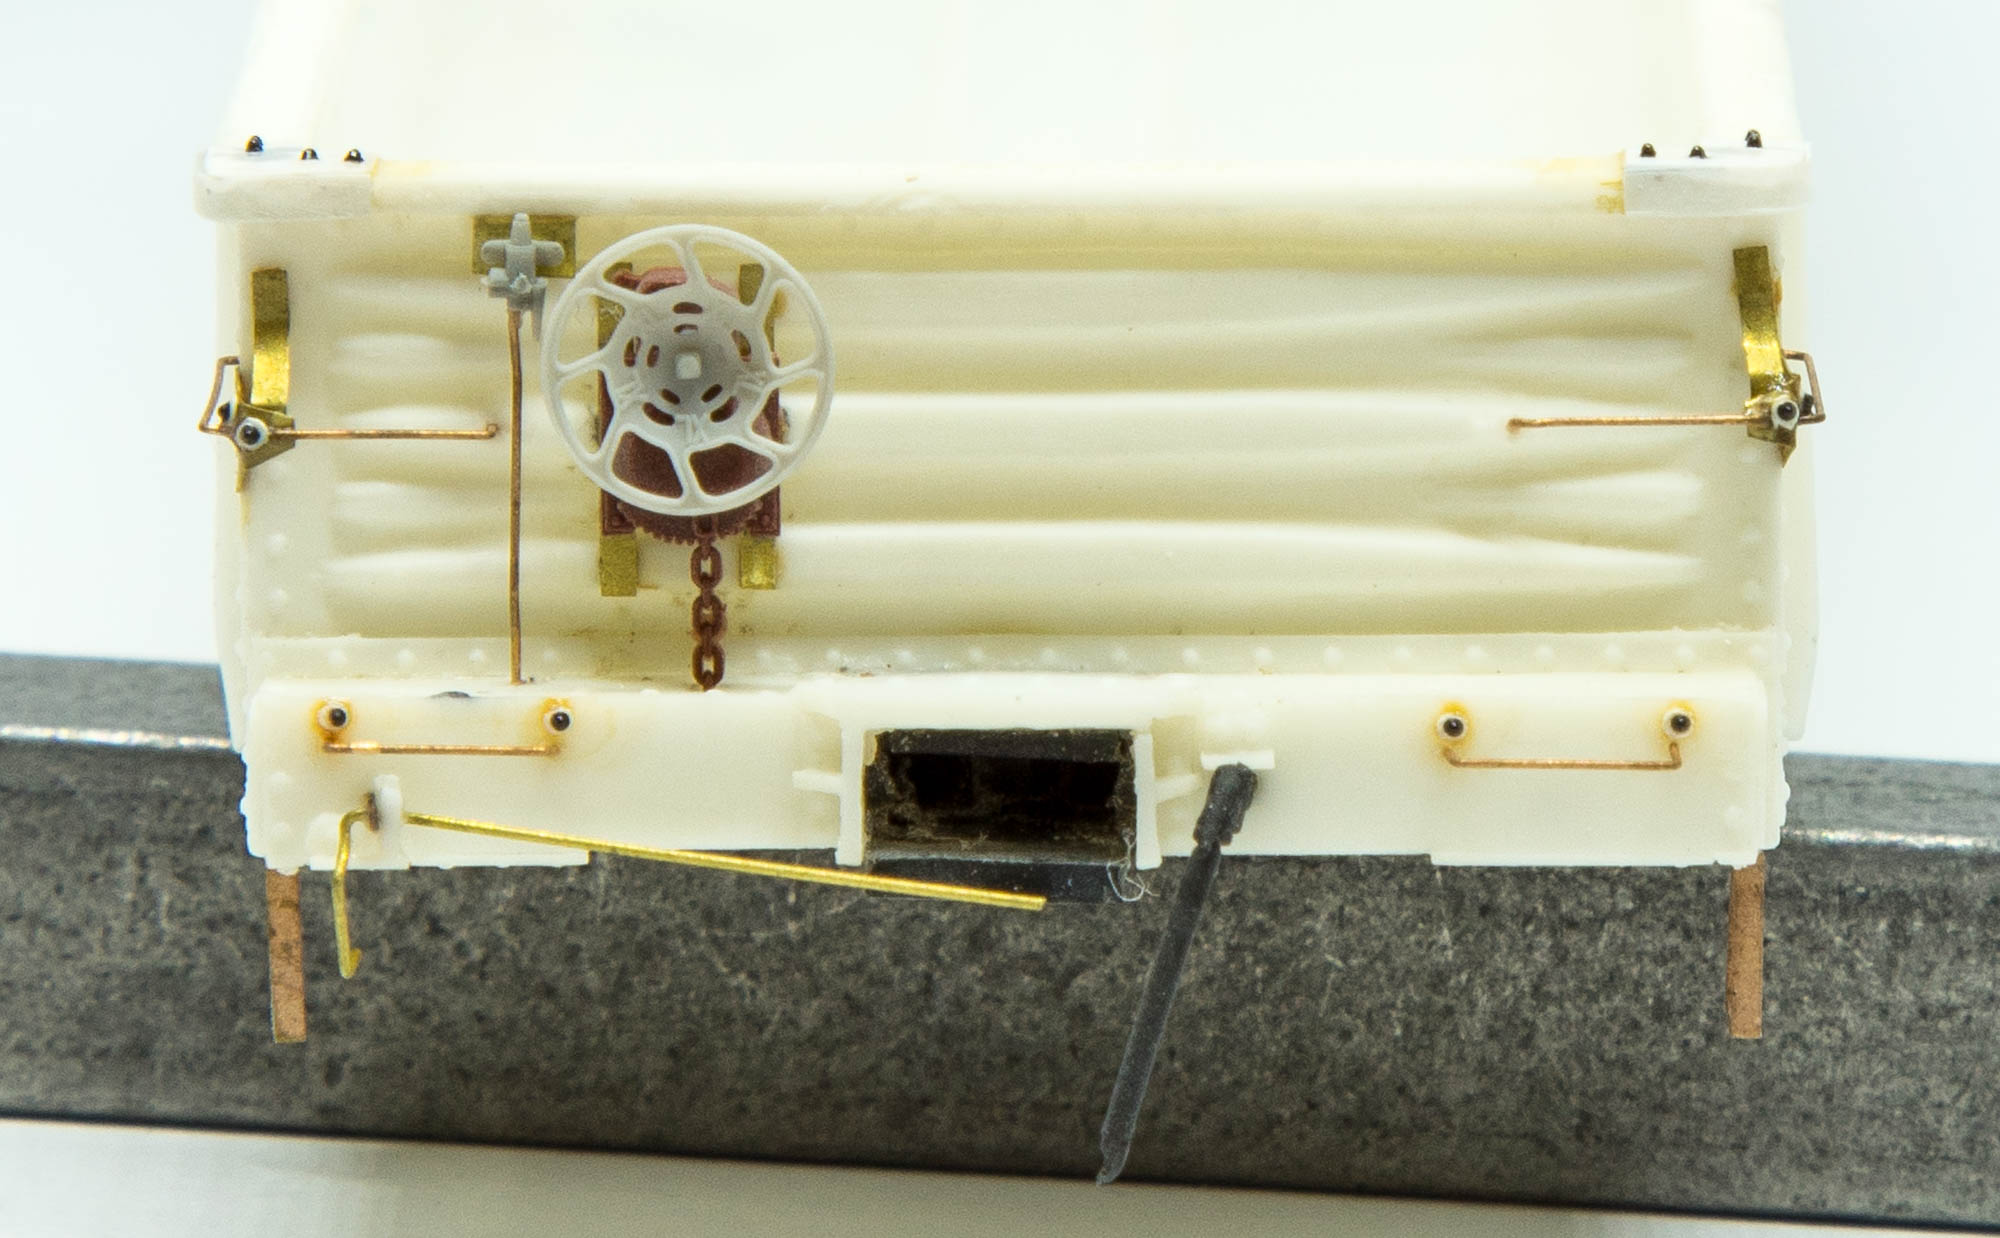
I made several changes to the stock Funaro & Camerlengo kit. The side and end grabs were modified using 0.003" sheet brass to replicate the prototype's highly unusual mounting arrangement. I added small 0.005" styrene discs and rivets harvested from an Athearn snowplow to complete the detailing. The hand brake is a Universal type, "robbed" from a Kadee New Haven PS-1, with an Intermountain hand wheel. The pressure retaining valve is from Precision Scale with a sheet brass mount. The angle cock/air hose is from Hi-Tech. The uncoupling device was bent from brass wire.


The sill steps are etched parts from Yarmouth Model Works. The towing loop (visible below the side sill under the first pressed steel side member) is an etched part from the scrap bin, as well as the route card holder (not visible in this photo, although I will highlight in the finished model posting.) Lastly, I fashioned the top corner gussets from 0.005" styrene.

I will bring this finished model to the upcoming NERPM meet in June.