Showing posts with label PS-1. Show all posts

Tuesday, May 19, 2026

PRR Early Welded Box & Auto Cars from PRRT&HS Annual Meeting


I attended the PRRT&HS's annual meeting in Gettysburg, PA this past weekend and had the pleasure of presenting a clinic, as well. I discussed the Pennsy's early welded box and auto cars, an interesting topic given the PRR's fairly large scale efforts at welding for freight car construction. It's also personally on point as I have been working on upgrading a Sunshine X41B box car and also preparing kits of the X43A and X45 for release. I will keep updating progress on the X41B here and the release of the X43A and X45 kits will be announced in all the usual places. 

Here is a link to my presentation file in pdf format. Thanks to the PRRT&HS for allowing me to participate.

Thursday, October 19, 2023

Chicago and North Western 40' Riveted PS-1 Auto Car


The right side of the model

I finally found a few brief blocks of time to weather my model of CNW 57868, a riveted 40' PS-1 auto car. My build is the pilot model for the Speedwitch kit (more are coming) for these cars. An aside is that this is the most ambitious offering to date that I have offered for Speedwitch due to the large amount of etchings used to replicate the details of the prototype. It is one of the most challenging kits I've built, but not really more than some of the kitbashes I've done. Enough about the kit...

and the left side

Before painting, I blasted the model with 600-grit aluminum oxide. I painted the car with Badger Stynylrez grey primer followed by black for the ends, roof, underframe, and trucks. I violated the "rule" of painting light colors followed by dark because I knew that it would be easier to mask and paint the sides than the reverse. After applying masking tape, I touched up the areas of black overspray with more of the Stynylrez followed by Mig AMMO Dark Rust (no. 041), a good match for the CNW's freight car red. I applied a coat of Quick Shine to create a gloss surface for decaling. The decals, printed by Cartograf, went down flawlessly. I sealed them with a coat of Quick Shine followed by clear flat from Tamiya. All paints were applied with an airbrush.


As part of the finishing process, I applied some chalkmarks both before and after weathering. As I wanted a car that was weathered, but not derelict-looking, I applied a wash of Titanium White oil paint heavily diluted with odorless mineral spirits followed by a coat of Tamiya clear flat. I then added a coat of Bragdon Powders Grimy Grey, which is fairly light once sealed with a flat coat. I cleaned the truck wheel treads, added the couplers, applied paper routing instructions, and CNW 57868 was ready for service. I believe this is one of the finest resin kits I have built, although I am slightly biased


Thursday, March 9, 2023

Update on Etchings from Presentation

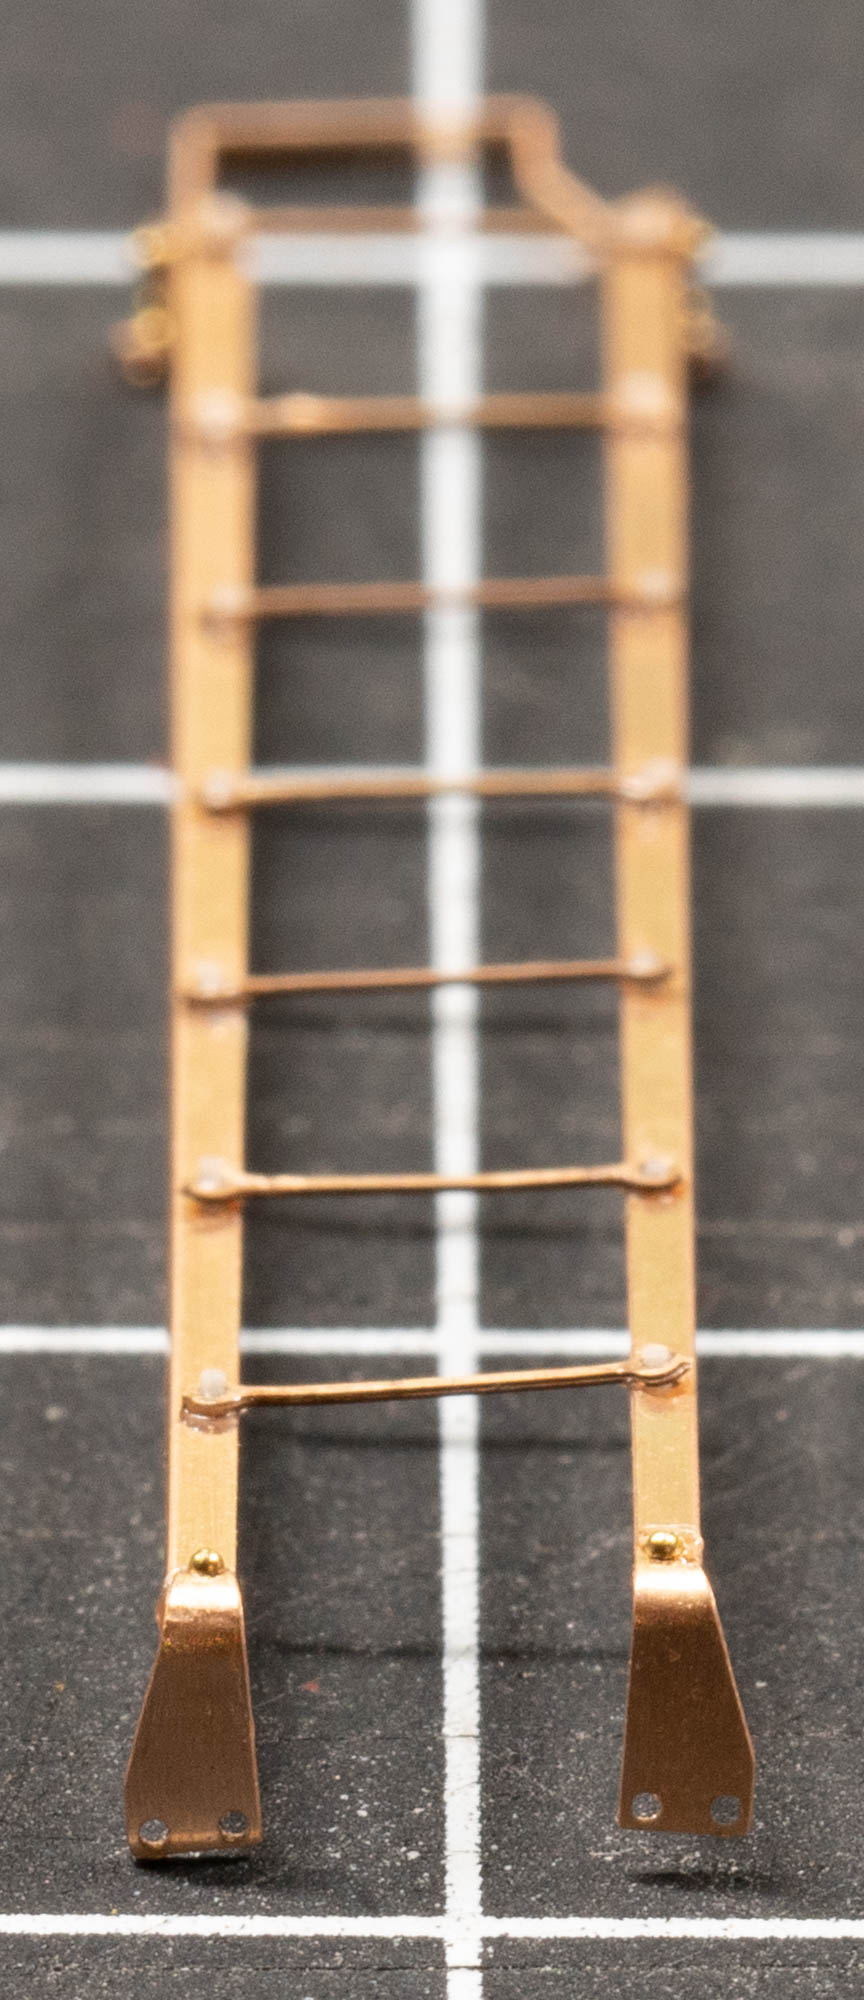
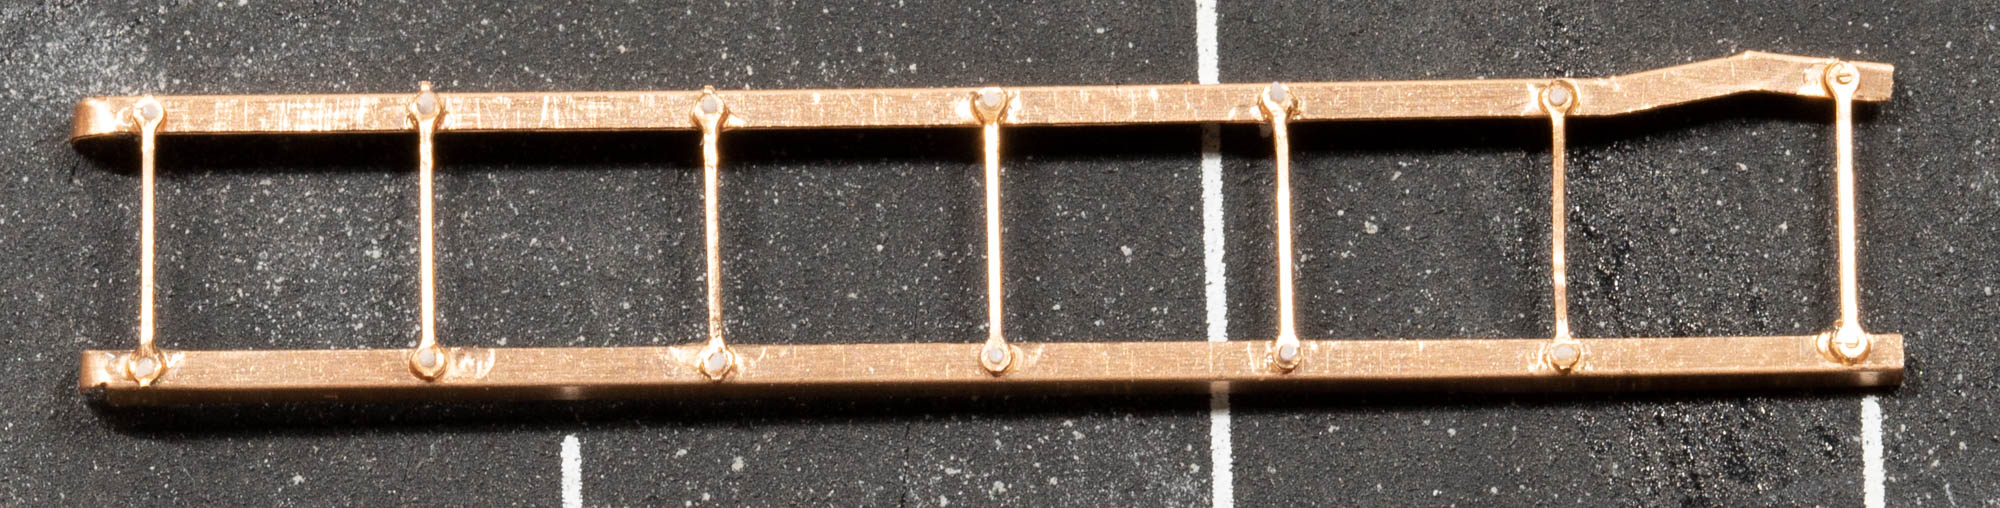
 During my presentation at the latest Hindsight 20/20, I alluded to the fact that due to the shipping delays in receiving my test etchings due to the Royal Mail hack from late December, I could not inspect and assess what I had received. I spent a few more hours looking at some of the parts, and have a few photos to share.

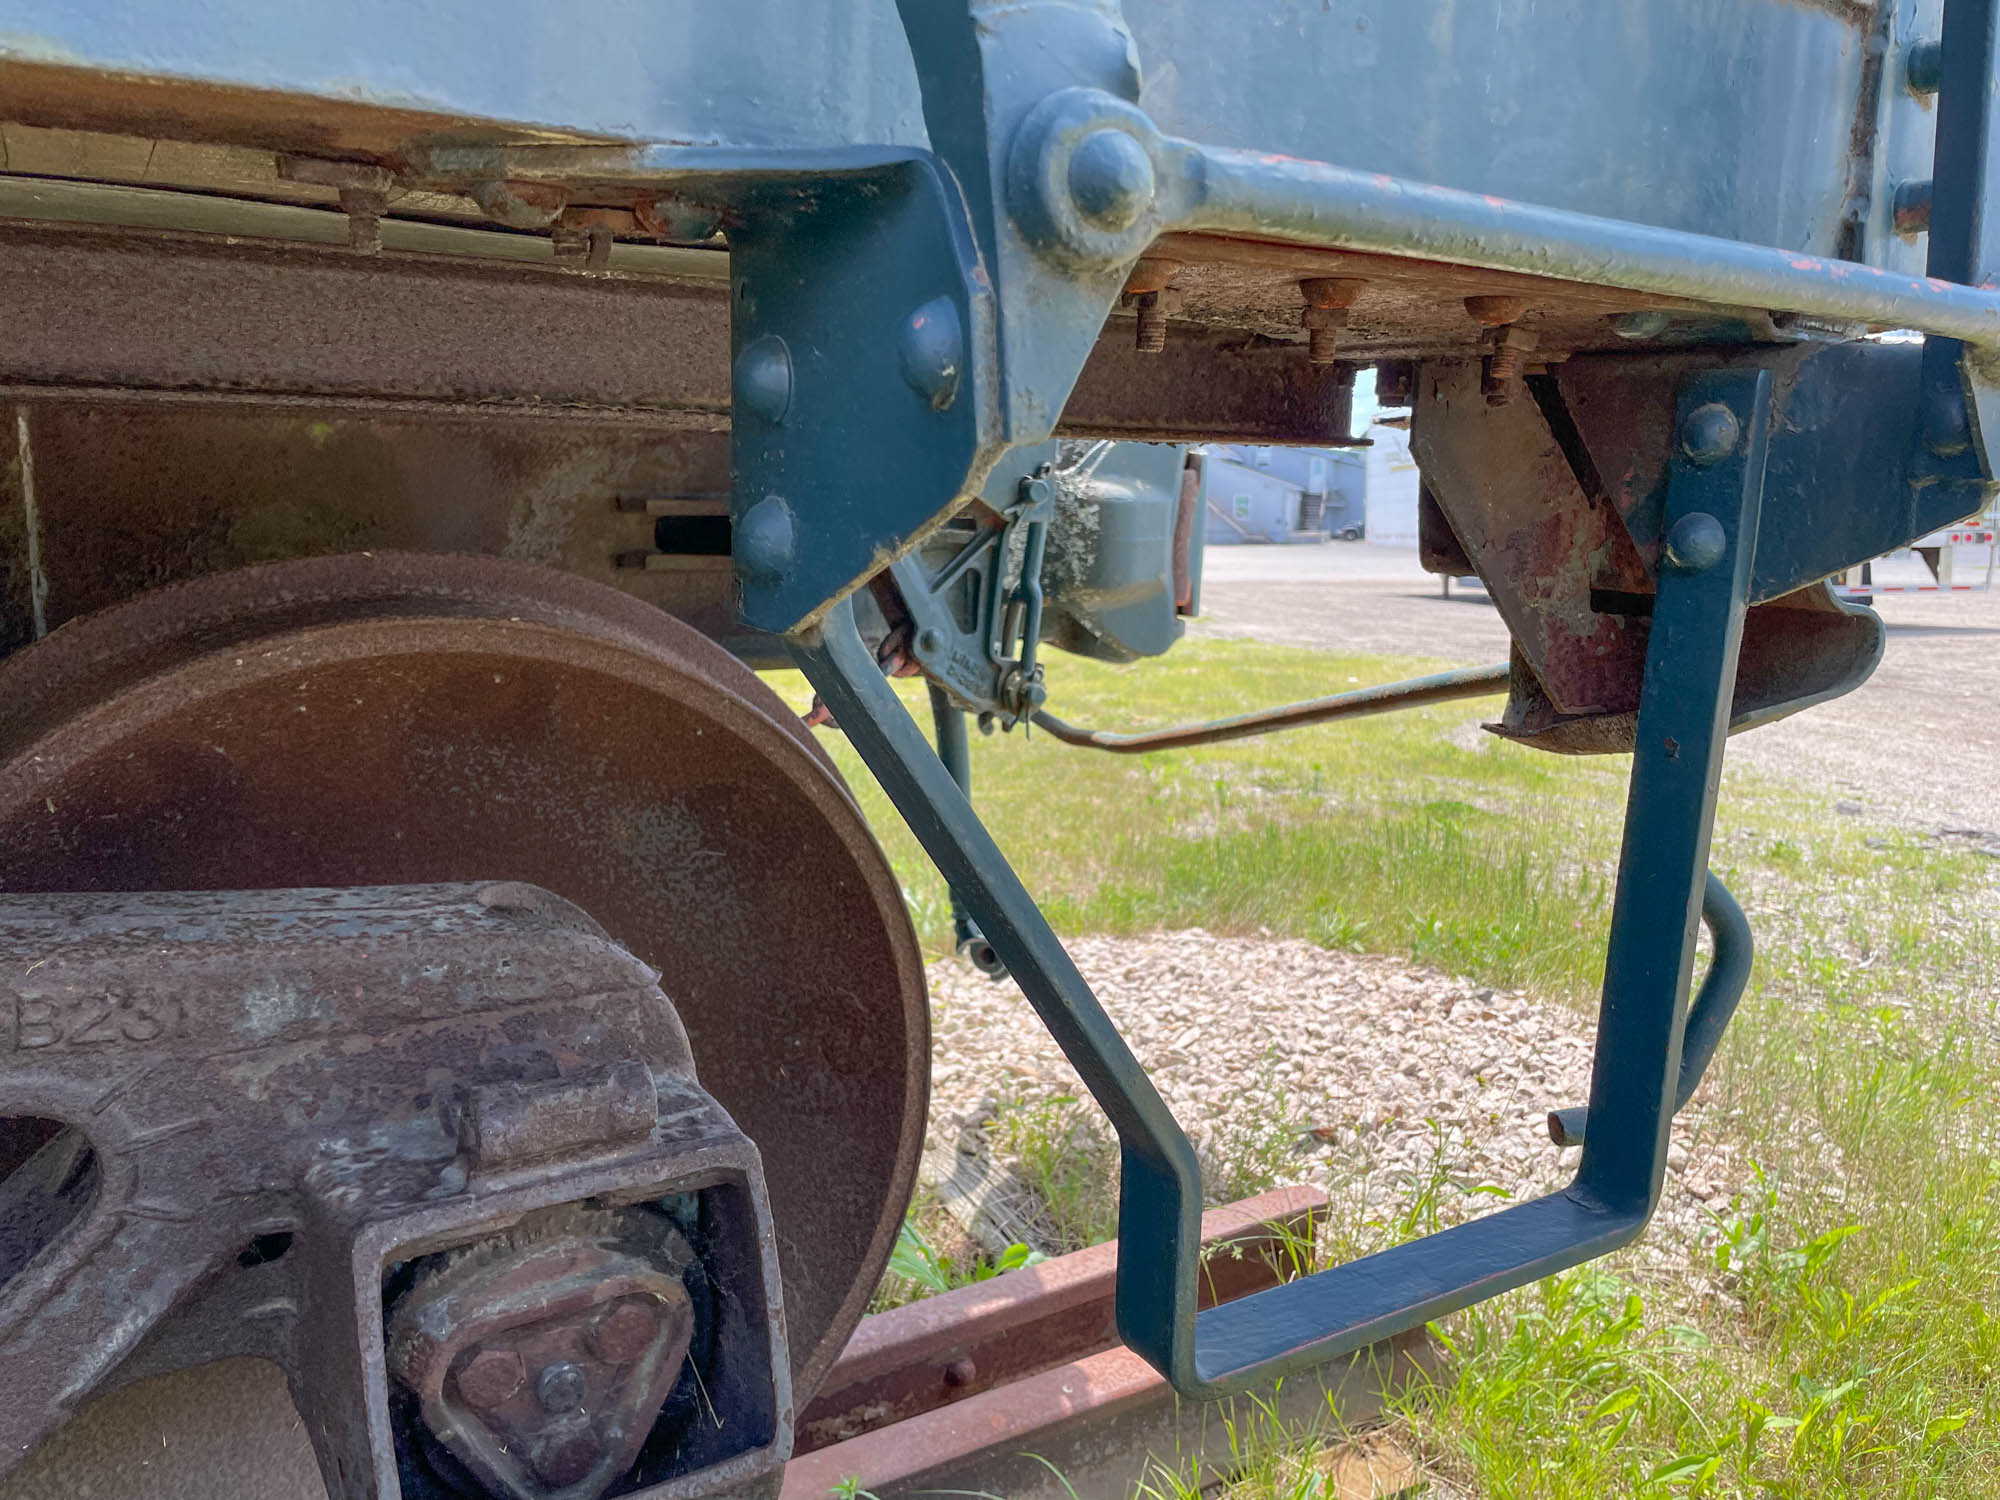
The first photos are of the ladders for PFE R-40-25/-26 reefers. The primary difference between the two is the -25 class used traditional ladders with treads (rungs) riveted to the ladders stiles while the -26 used Wine-style ladders where the rungs had bends that fit into holes in the stiles, that once attached to the car held the rungs in place. What is displayed here is the -25 riveted style. Compare the prototype photo, above, to the etchings shown below. The sill steps were attached to a bracket that was also integral to the bottom of the ladder stiles, with the entire assembly attached to the bottom face of the side sill in two locations.


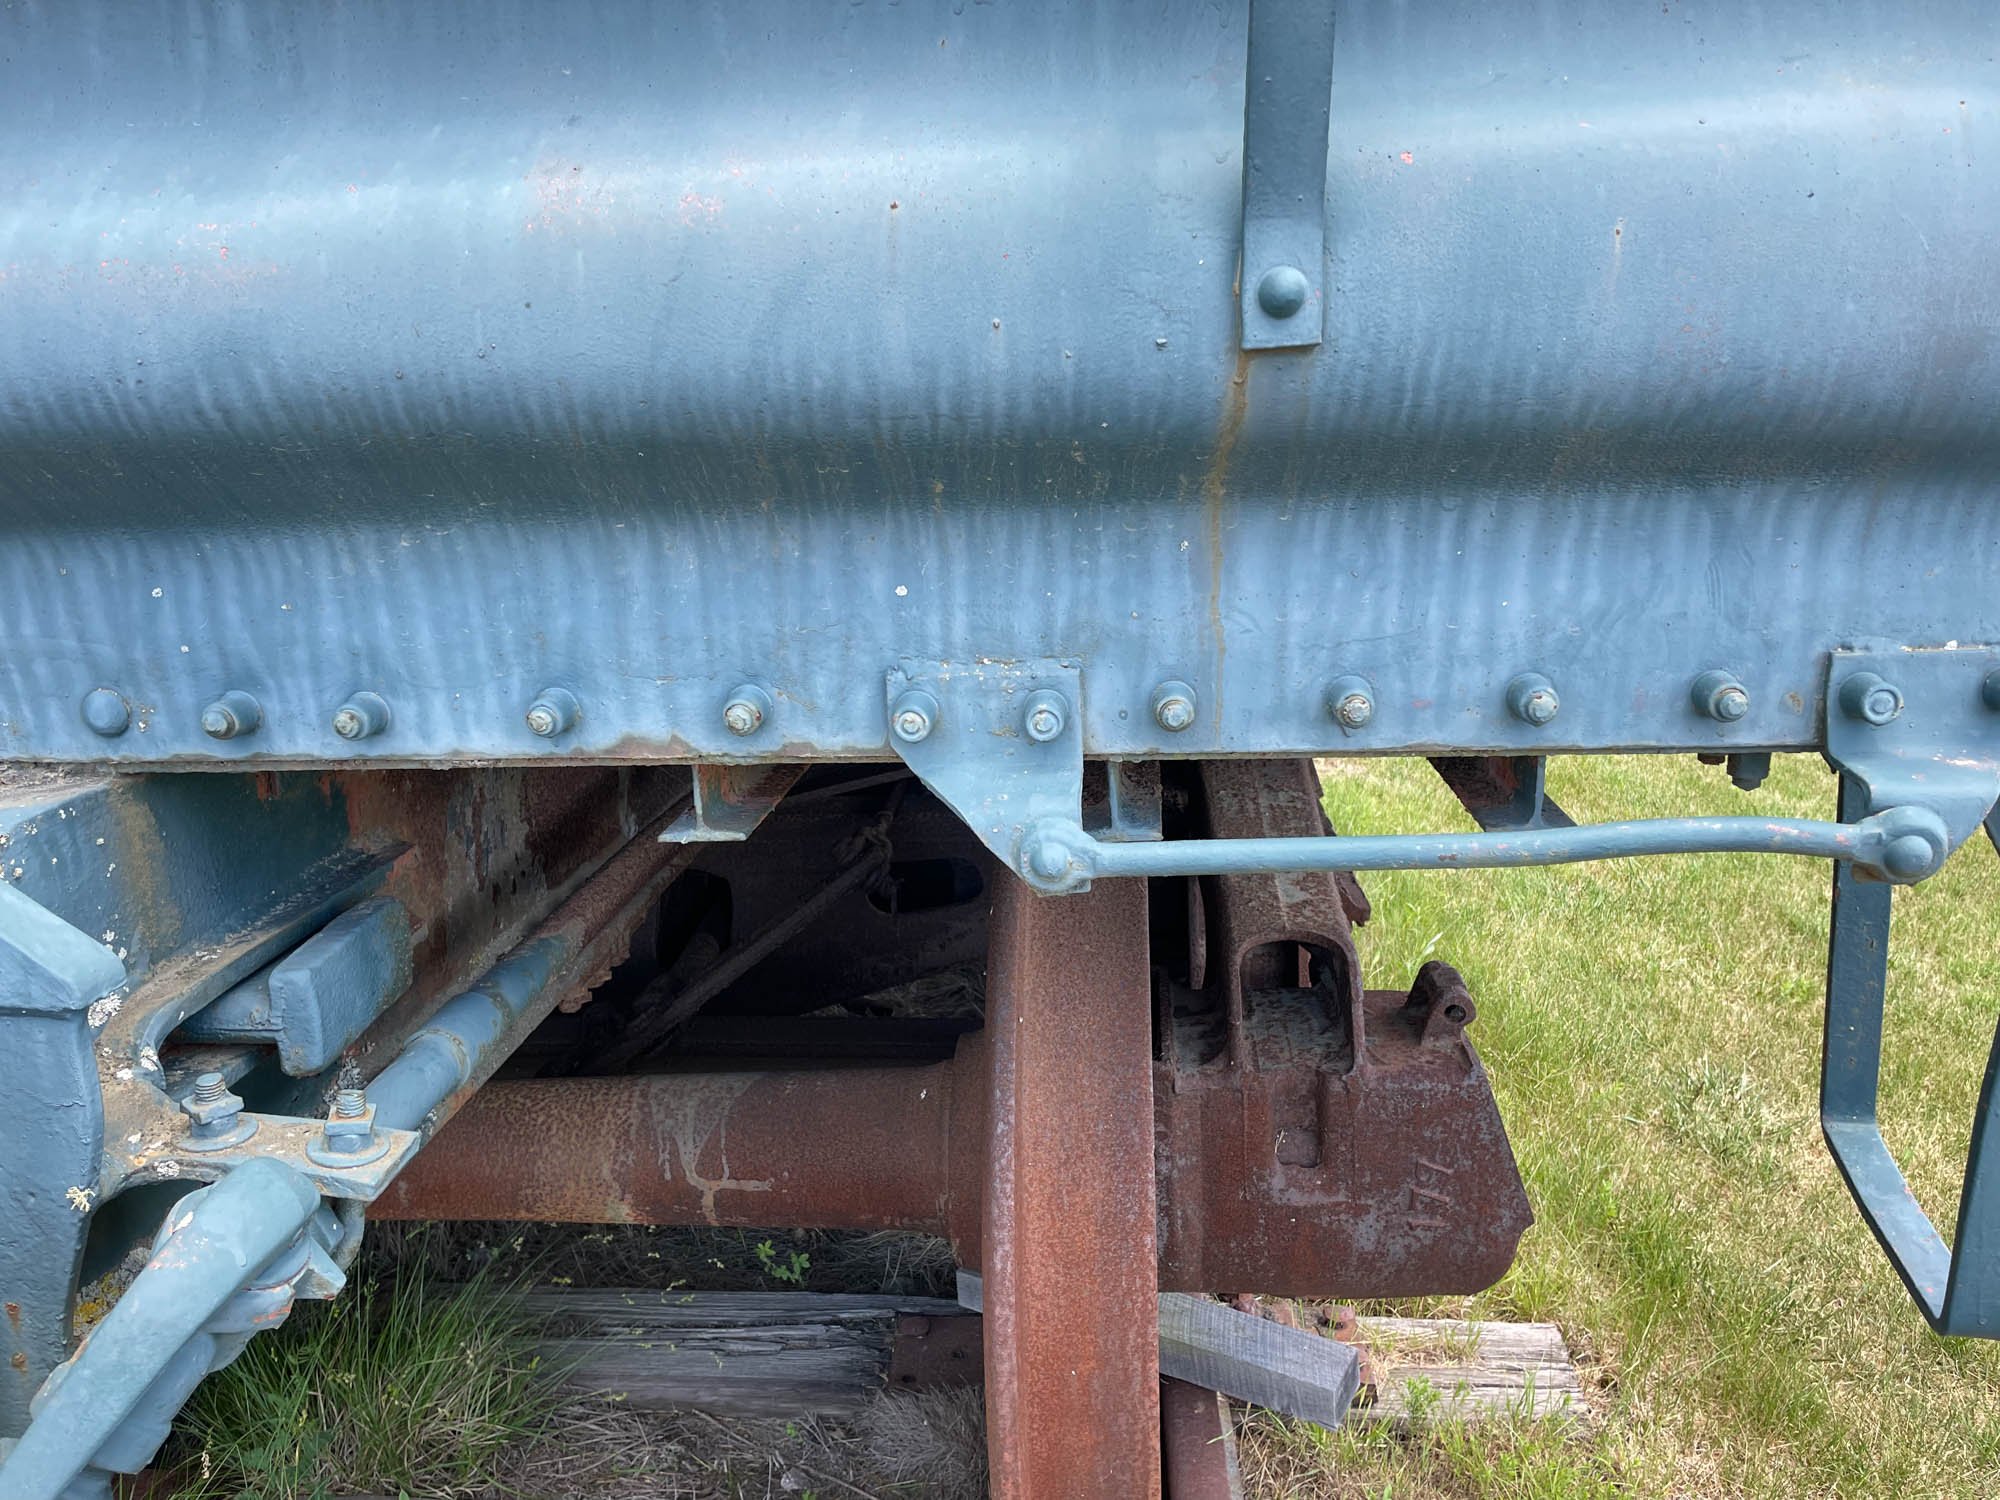
The next group of photos are of etchings for a Chicago and North Western PS-1 auto car. Common to all but the earliest PS-1s, that arrangement featured an integral ladder stile, sill step, and bracket attached to the bottom of the side sills, similar to the R-40-25 shown above. [the prototype photo below illustrates this arrangement on a Maine Central PS-1 box car]

There was an interim style of end ladder on PS-1s, with a "jog" in the lower portion of the right stile. Early PS-1s had straight stiles, while later ones had the same "jog," but with two wider bottom rungs, as opposed to one. [note: I could've done a better job bending the little jog to make it straight!]

The last parts I will highlight are two types if zee bars. Most PS-1s had crossmembers that were 4" zee bars. An etching to replicate that is shown in two views. The other simulates a 3" zee bar that will be used to replicate the stringers between the body bolsters and end sills. The photo illustrates the cross section. Etchings such as these have many applications as zee bars were quite common. Until I have more to report...


Friday, July 15, 2022

Maine Central PS-1 Box Car


The side sill support spanning the body bolsters was not original

In my post about the BAR RS-4 reefer that I saw in Machias, Maine, I alluded to a Maine Central PS-1. This post highlights some of the details of that car. The Maine Central rostered three groups of forty-foot PS-1s: an early-style group from 1947, car nos. 6500-6749 and a later-style group built in 1951, series 8000-8249, both with seven-foot door openings and series 8400-8549 with eight-foot door openings, built in 1961 [post edited to reflect this based upon comments submitted below - thank you.] The car shown here is from that last group. I took several photos of details that I want to be sure to have for modeling purposes. Those images follow.

I took several photos of the interesting, integral mounting of the sill steps and ladders


The roller bearings were not original equipment

I recorded several images of the bracket for the uncoupling devices


The bell crank

Miner hand brake housing, wheel and brake step

I recorded several images of the end sill/car end bottom and grab with the end stringers visible. The unusual rivets on the bottom of the end are not original and I don't believe the stringers are either as I am fairly certain they were zee bars on original PS-1s, not the I-sections shown here.


Right lower end bracket grab iron

Slack adjustment mechanism on the dead lever

One reservoir mount, to a crosstie (zee bar)

and the other, to a crossbearer

Camel door stop

Monday, June 13, 2022

Kadee Lake Superior & Ishpeming PS-1 Box Car Completed


I recently completed my model of a LS&I PS-1 that I started a couple years back. The prototype info can be found via this link and the original modeling info can be accessed via this link. This post highlights the finishing of that model, most notably the painting and weathering. The task was to blend the "bare" areas of the doors, lower doors tracks, and other details in with the decorated portions of the model and to also create the sharp transition between oxide and black at the corners that was rather sloppy on the model as it came from Kadee.


For the oxide color, I experimented with an acrylic ink product that I anticipate using again in the future, as it airbrushed beautifully. It comes in a rainbow of colors and is incredibly convenient for me since I can buy it at my local Blick's, about three blocks away in Brooklyn (Blick's also carriers my preferred super glue, airbrushes, PanPastels, and kabuki masking tape, making it a go-to stop for many of my hobby needs!) The inks are called abstract acrylic ink by Sennelier. The color I used was 645 - Chinese Orange. The color is not a 100% match, but I was able to get it closer by using some Pan Pastels to lighten it enough to be passable. I sealed everything with a coat of Future and added a few chalk marks. These were sealed with a flat coat.


For the weathering I used Bragdon's grimy grey powder. I applied it in vertical streaks to simulate light streaking. I sealed that with a flat coat and then applied another coat of Future. I added several more chalk marks. I also masked around the existing repack stencil and applied a thin coat of oxide red for a newer repack. I added the new repack stencils from a set of New York Central decals. I sealed everything with a final flat coat.


A couple other notes of mention: I used Kadee's ASF A-3 trucks, but replaced the wheelsets with Kadee ribbed back 0.088" tread width wheelsets. I also used Kadee screw mounted draft gear ("coupler boxes") in place of the kit's original boxes. A keen observer will also note that I need to add the angle cock/air hose parts (from Hi-Tech) to the brackets to actually complete the model!

Now I have another mostly ready-to-run Kadee PS-1 for the fleet. I plan to replicate this model exactly, but letter it for New York Central (if you read the prior posts on the LS&I prototypes, you will find that the LS&I cars were piggybacked on a NYC order.) I will blog about that model when I get around to building it.

Monday, January 20, 2020

Modeling the Lake Superior & Ishpeming PS-1 Box Car - Part 2


This is the left side of the car as re-detailed
Over a year ago (!) I wrote about the things I would need to do to model a Lake Superior & Ishpeming (or New York Central) PS-1 box car. I have done almost all of the work highlighted in the post and the updates are shown here. I am certain that with some paint and weathering the white bits that are difficult to see herein will display more clearly. I will post the finished and weathered model in Part 3.

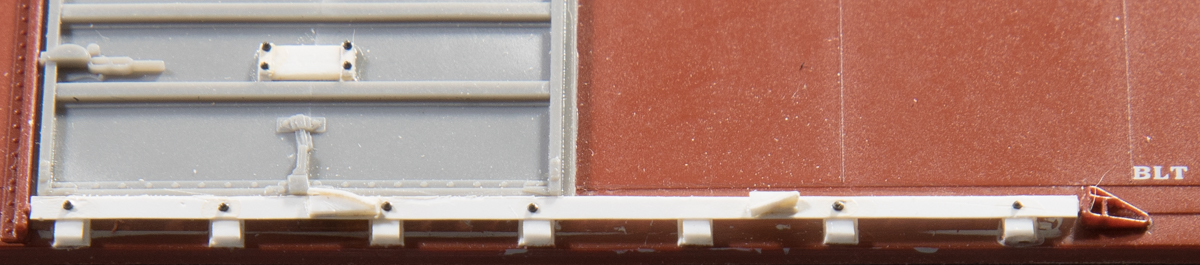
This is the first phase of the lower door tracks. The seven lower pieces are 0.015" x 0.040" strips on a scale 5 inch wide strip of 0.005" with equal overhang on both sides. The upper strip on edge is an HO scale 1x2.

The "face" of the track is a 4 inch wide 0.005" strip. Individual rivets were glued in place (note that the "missing" one was flicked off and needs a replacement.) The fixtures that held the door open or closed are scratchbuilt using photos as guide. They will undoubtedly be rendered better in photos once painted.

The lower right corner, with push pole pockets (they were welded in place so there are no rivets, just pairs of discs punched from 0.005" styrene.) The sill step is from A-Line while the short sill section and corner "wraparound" are scratched from styrene.

The push pole pocket was fashioned from a styrene disc that was shaped (note that the left edge is "open" in a crescent shape as on the prototype) from a styrene disc. The center was "dished" using a no. 50 drill. The uncoupling lever was bent from 0.012" wire and the bracket is sheet brass bent to shape.

The defect card holder on the sill of the right side of the car was created by filing 0.015" x 0.025" styrene strip (0.010" x 0.015" butt-glued against a 0.015" x 0.015" strip) and adding a 0.005" styrene "flap" as shown

The placard boards were created to replicate those of the prototype, using individual boards and a "frame" of 0.005" styrene

The AB brake components, piping, and rods were all replaced

The view from the "top" of the underframe

Thursday, November 21, 2019

Kadee Early PS-1 40' Box Car

Earlier this year, Kadee released an early version of the Pullman-Standard PS-1 40' box car. As seen in the photos, they tooled an entirely new car body with details to match the early versions. The basic model is shown here in New Haven livery (Kadee did an excellent job capturing the NH's freight car red color, as well as the black doors.)


The most notable differences are on the sides with the tabs and sill sections below the actual side sills. Notice not only the bolster sections within the green-rimmed rectangles, but also the sections that span the area below the doors. The early version is shown at top above (the NH car), while the undecorated car is one of the previously released models that replicates the cars circa 1949 and later. There were many subtle variations in these details prior to 1949. Kadee's model is tooled to represent one flavor, with 6" ship channel tabs at the bolsters, 6" x 3-1/2" bulb angle reinforcements under the doors, and 4" x 3-1/2" rolled angles at the crossties.

The early version of the roof on the newest Kadee car is shown at top, while the later 1949 roof is shown on the model at bottom. The difference is the absence of the corrugation in the end panels on early (roughly pre-1949 built) cars. Both iterations have riveted seam caps (there were prototypes with welded seam caps).

The early PS-1 end is shown at right. Note the absence of trapezoidal stiffeners at the top, the three-point bracket grab at right, and straight stiles on the ladders, as well as the grab below the ladder on the early New Haven car. Also, of interest is the Universal power hand brake, particularly the wheel, which is stunning and has never been offered in HO. Unfortunately, it is not correct for the New Haven's Universal hand wheel as shown on the prototype below. 


The underframe shown above is from the New Haven model. Unfortunately, it is not correct for early cars, as Kadee did not tool a new underframe. Early cars used what were essentially welded AAR underframes. The PS-1 welded underframe, similar to that shown on the model above, was introduced in 1949. The main difference was that in 1949 there were only four stringers total, as opposed to the six on the Kadee model, a 1951 introduction.