Showing posts with label McKeesport Connecting Railroad. Show all posts

Monday, January 9, 2023

McKeesport Connecting Gondola finale


Side view of the finished model

I recently finished my Funaro & Camerlengo model of a McKeesport Connecting Railroad 50' gondola. The big hurdle was completing the load. Below, I will chronicle how I secured it into the car body. For the previous posts on the model, please visit these links: Part 1, Part 2, Part 3.

First, I will briefly touch on the painting and weathering. The specs for this group of cars called for Scully #320 black graphite for the paint. I opted for a dark (but not close to black) grey to simulate this. Even heavily weathered the car appears grey and not black, the desired outcome. I also created a separate decal for the Pratt & Lambert "Vitralex" red circle in the emblem. The rest of the decals, except the reweigh and repack stencils, are from Jack Consoli's custom lettering for these cars. I sealed everything with Tamiya flat and applied several alternating coats of weathering and chalkmarks using PanPastels. The rust streaks were created using artist's oils thinned with mineral spirits. I dabbed the rust color on the side and then thinned and streaked it using the mineral spirits. 

I finished the weathering by adding PRR freight car oxide patches along with reweigh and repack stencils from a Speedwitch PRR set. I also added some fairly fresh chalkmarks at this step, as well, and sealed everything with a final Tamiya flat coat.
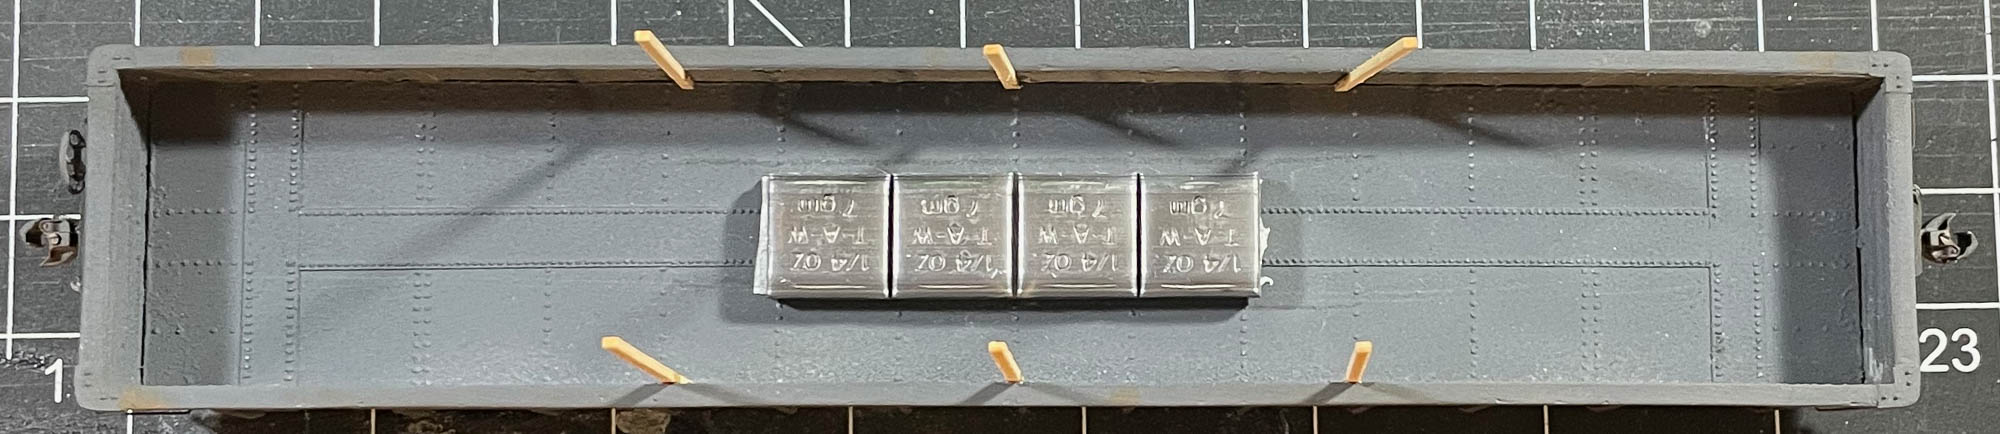

To secure the load, I began by adding the appropriate (for me) amount of weight (I tend to have my cars [consistently] lighter than NMRA standards, with the consistency being key... I am creating a fairly flat switching layout and the weights work well for my needs.) As shown above, I used self-adhesive lead tire weights, being careful to ensure that the bottom layer of pipe (drinking straws) would fit into the car body with no impingements, as shown below. I also added the first three sets of wood stakes to be used to contain the load and for tying together each level of pipe with wire (black thread.) The wood is technically supposed to be at least 4" x 4". However, the inside width of the model plus the thickness of the wood strips limited me to 2" x 4" pieces. It's not all that noticeable and is a concession I can stomach. I glued the strips against the inner face of the sides using a 50/50 mix of Goo and MEK to tack them in place followed by some ACC. The combination is secure with some measure of flex.


I carefully wedged the pipes in between the wood stakes to again ensure all fit as intended. Once satisfied, I removed the bottom pipe layer.
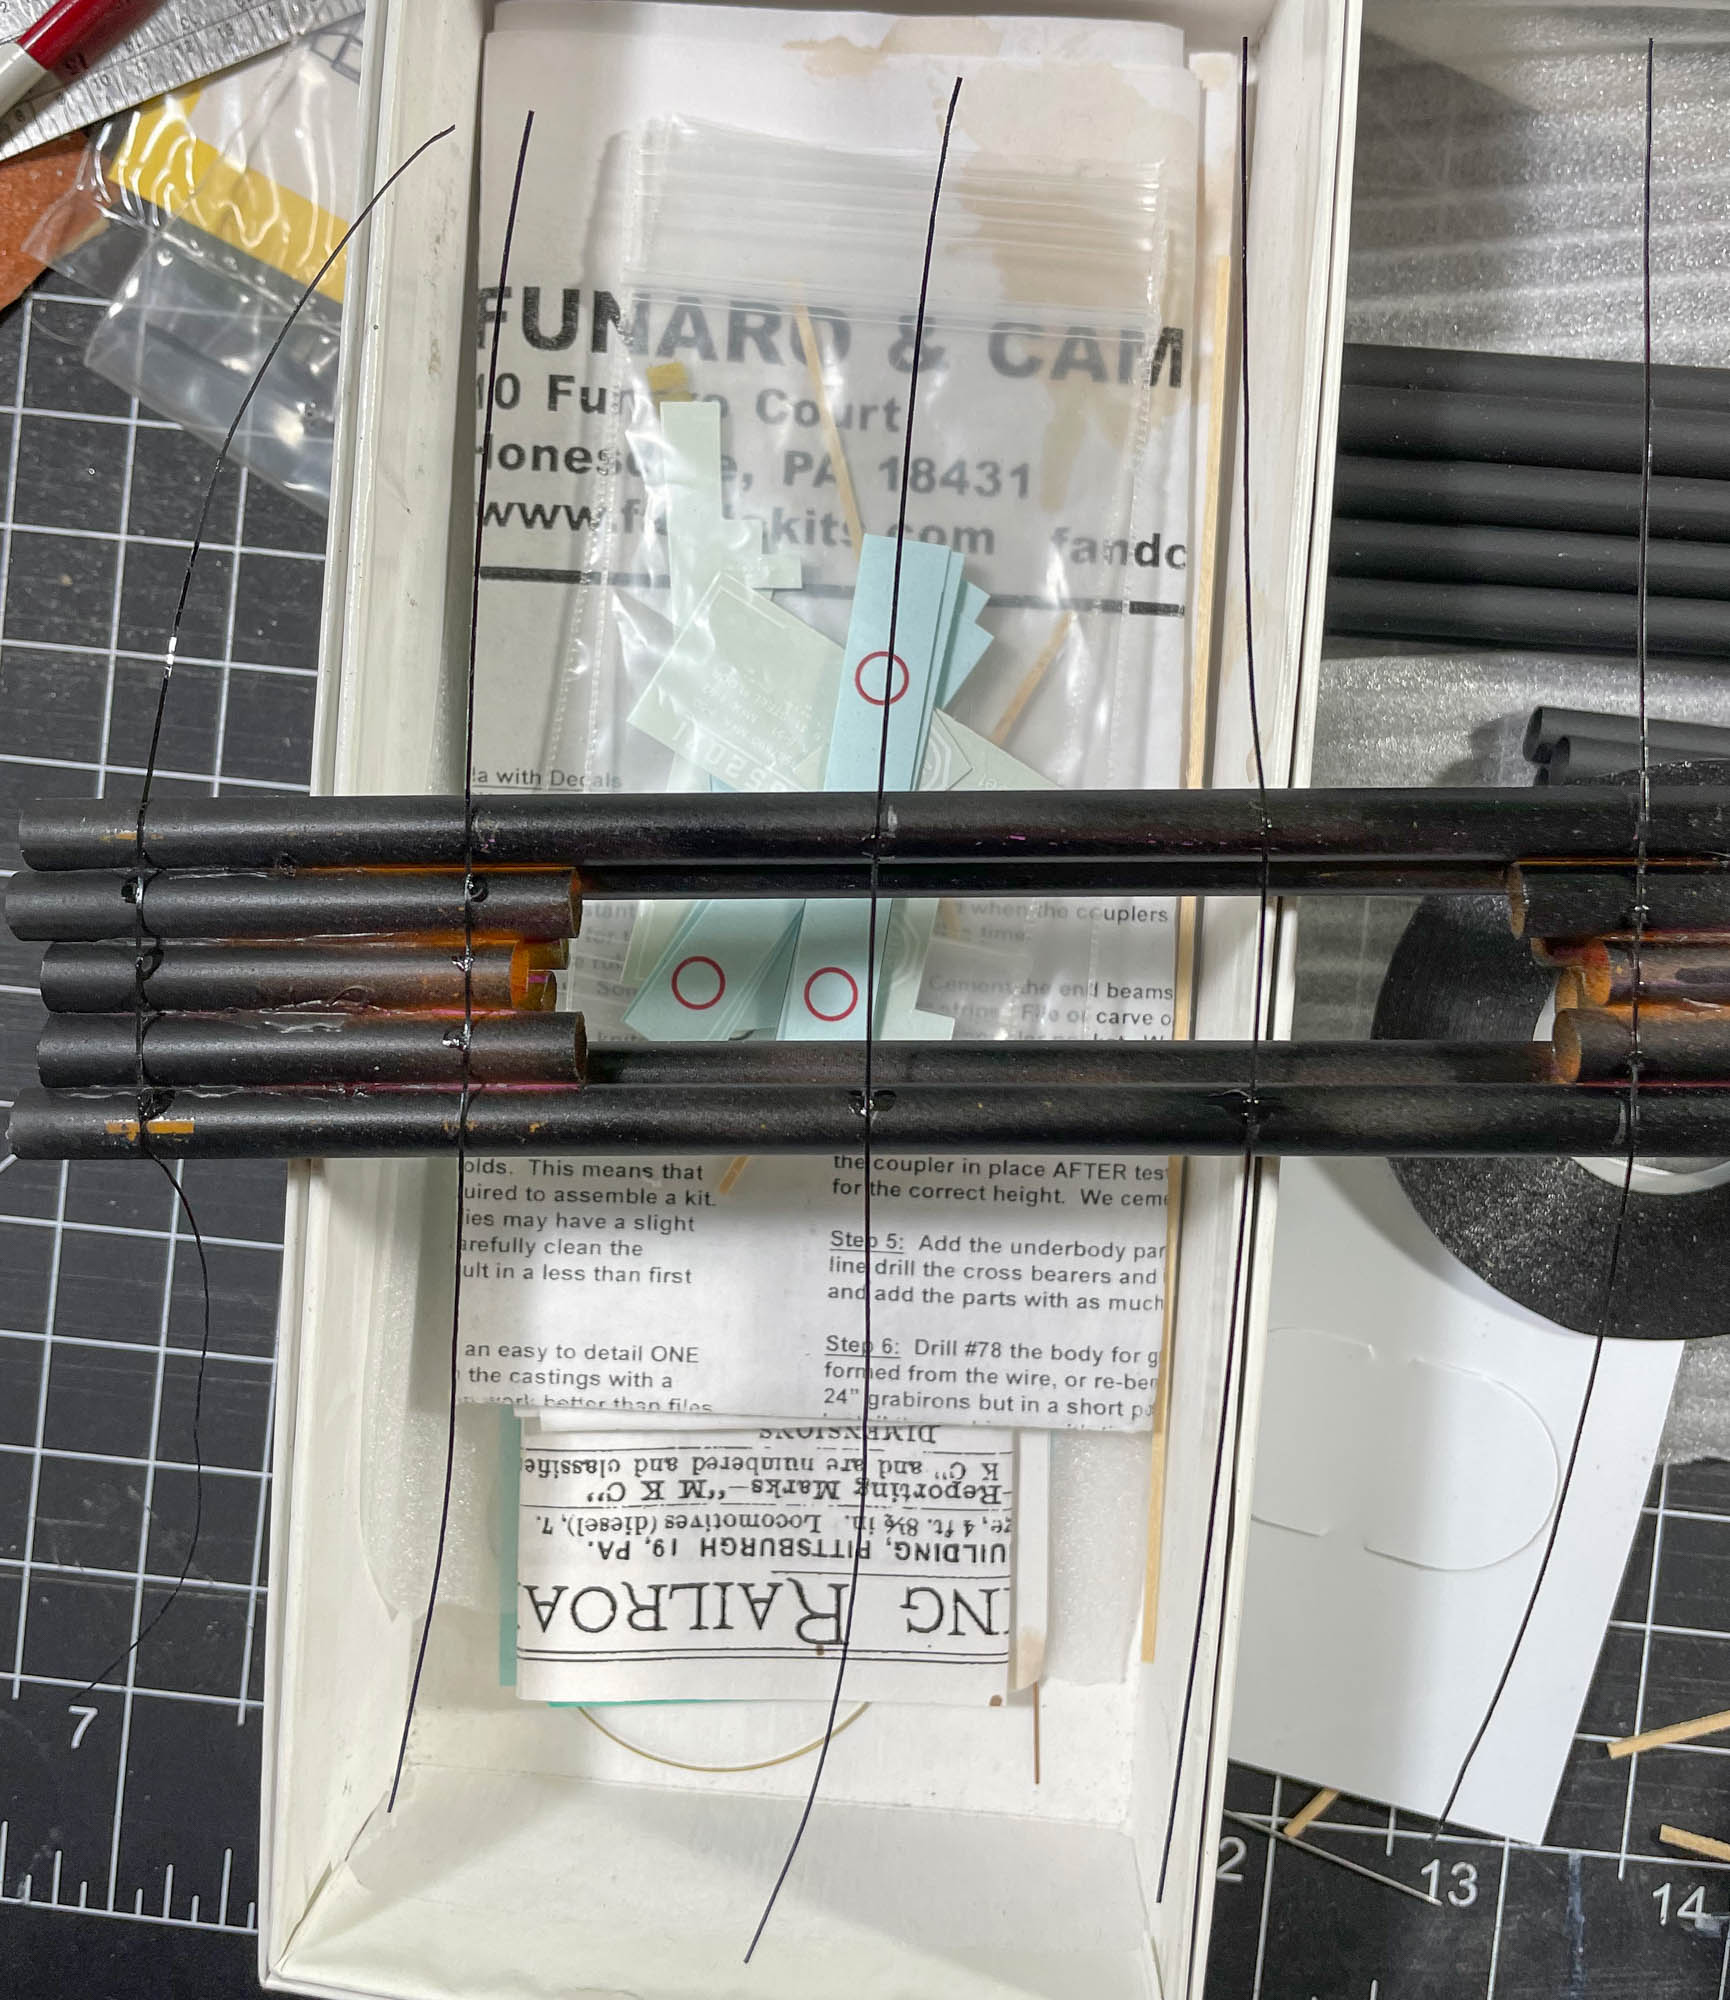

I carefully added Chartpack tape in six places, as shown above, with long strips left flopped over. This was a necessity as each layer of pipe had to be tied together with wire (string).


Once I had the Chartpack tape secure, I re-inserted the bottom layer of pipe and added the end pieces of wood strip, again secured with Goo/MEK and ACC. I also added the first pieces of thread to simulate twisted wire. These were added to each wood stake and then glued to some part of the pipes. Since this part of the "wire" is invisible, attention to detail is not paramount. The "wire" is actually number 50 black thread. It is quite old and has been kicking around my modeling supplies for years.


This photo provides a tighter view of the thread. The second pipe layer was added in an identical fashion, again gluing it to the pipe to secure in place.


With the top layer added, I could complete the Chartpack "bands" and wire. The bands were carefully pulled taught and attached to each other in the top and the center of the load. I created "clips" from 0.001" sheet brass. These served two purposes: to simulate the clips used to secure bands on the prototype and also to provide a place where the Chartpack tape could be secured and glued with ACC. I believe that the bands on the prototype were likely a Signode product (I used Signode to band crates when I worked summers at a machine shop as a teenager.) The metal straps had a piece of metal crimped over the spot where the straps overlapped in order to secure them. I painted these "clips" made from brass with a non-descript grey. 

Since the top layer is visible, the simulated wire must appear to be one uniform arrangement across the top of the load at each set of wood stakes. In my hands, I carefully twisted thread around and used sparing amounts of ACC to hold the twisted shape in place. Once that had set, I looped the end over a stake. Then, using two sets of tweezers, I made several twists in the other end, with the thread already looped around the stake. This was accomplished by holding the thread with one set of tweezers and using the other to go "over-under" many times and then securing that with sparing amounts of ACC until the twists held firm. I repeated that for each set of stakes. Once finished, I carefully trimmed the excess thread and was done! The load is quite secure inside the car body and I am happy with the results. The one thing I will watch over time is the glossy face of the Chartpack tape. If I find it objectionable or unrealistic, I will go back and flatten it some.

Monday, January 2, 2023

What's up?

It's been quite awhile since I posted. I thought it time for an update on things and what I'm working on at present. I was part of a layoff in November so my circumstances have changed quite dramatically in a short amount of time. One benefit, if one could call it that, is that I have had a little more time for train-related things.

The first area where I have focused is to complete the artwork for some test etchings to serve as validations for several ideas I have had percolating for years. While they are broad in scope, they fall into a few areas, including highly accurate scale renditions of ladders, with treads (rungs) that match the prototype right down to the "dumbbell" shape, several styles of sill steps, side sill support sections, brake adjusters, and other various details, some highly specific, such as details for an F&C F29 flat car, including sill steps, load brackets, and brake beams. My interests with the etchings are two-fold: to increase realism and fidelity to detail and in certain instances to provide long-term durability (think things like ladders, steps, etc.) The first batch of test etchings should arrive early in 2023 and will allow me to complete several projects that have languished, in some cases for years. More on those below. Some of these etchings may become products similar to the excellent offerings from Yarmouth.

Another area I am exploring is 3D printing. I recently completed a refresher course in Rhino to reacquaint myself. It is a solid modeling tool used in many industries, including jewelry design, architecture, and set design, among others. I have used it on and off for years and am now even more committed because I made another investment to complement Rhino: a Phrozen Sonic Mini 8K 3D printer that has the highest resolution of consumer 3D printers (although that accolade likely has a shelf life similar to milk!) I expect it to afford me a means to easily create parts for scratchbuilding and kitbashing projects with some having carryover to possible resin offerings.

I am at work on Volume Six in the PRM series that will again focus on some interesting modeling subjects, some of which have been referenced in previous blog posts. Models in the queue include:

  • Straight side sill support box cars, including NP 40' and 50' prototypes and GAEX 'DF' box cars, including their Duryea underframes
  • PFE R-30-4, R-40-4, and R-40-8 prototypes and models
  • Rutland flat car kitbash
  • GATC postwar 7,000 gallon acid tank car kitbash
  • CNW 40' PS-1 auto car modeling
  • Rebuilt FGEX refrigerator car
  • other subjects, space permitting

I have a number of projects that are close to the finish line. The test etchings should allow me to complete several over the next few months including the following:

  • CGW 1937 AAR box car (Naperville gift parts set from a few years back)
  • NH 1937 AAR box car (started only about 15+ years ago)
  • PRR F29 depressed center flat car (referenced above)
  • McKeesport Connecting Railroad gondola (shortly, I will post the last installment to update the work to the finished model shown above)
  • Santa Fe Bx-34 Modified 1937 AAR box car with 3D printed and etched metal parts

I will be attending Prototype Rails for the first time in three years. I have committed to presenting about PFE reefers, including the fleet at January, 1953 as well as many interesting details for modeling considerations that are easily lost in the scope of PFE's massive fleet. For those unable to attend, the clinic file will be shared here after the event.

Sunday, May 15, 2022

Update on McKeesport Connecting Railroad Gondola

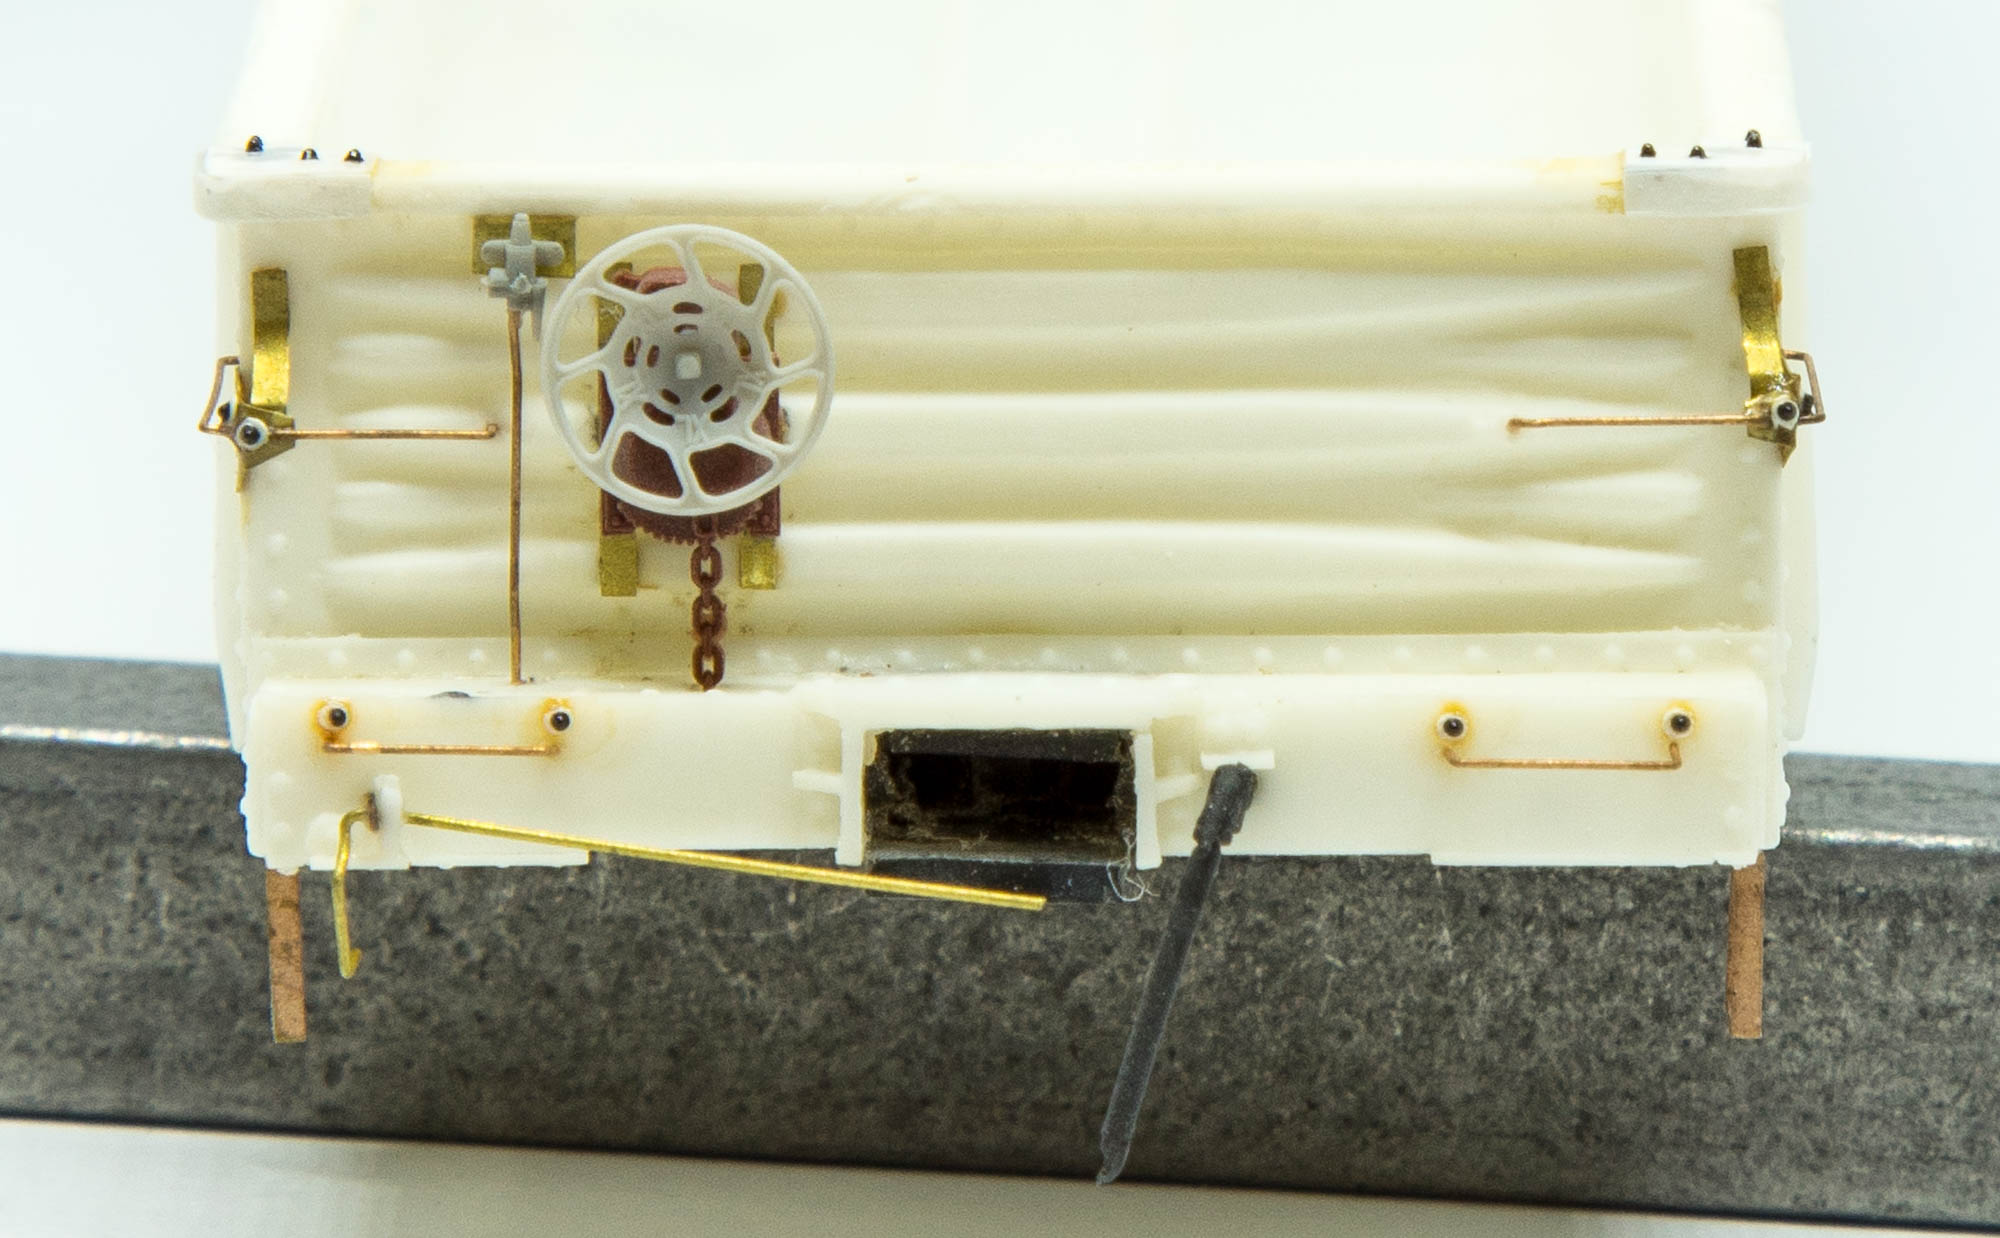
I was combing through Adobe Lightroom looking at photos as I worked on the McKeesport Connecting Railroad gondola (first and second posts linked) when I realized I never posted these images. The model is now painted and decaled and I am working on the load and weathering. I will post that info soon, but I thought I would share this interim update. The main image (above) shows the car after I had sandblasted it, but prior to priming and painting.

I made several changes to the stock Funaro & Camerlengo kit. The side and end grabs were modified using 0.003" sheet brass to replicate the prototype's highly unusual mounting arrangement. I added small 0.005" styrene discs and rivets harvested from an Athearn snowplow to complete the detailing. The hand brake is a Universal type, "robbed" from a Kadee New Haven PS-1, with an Intermountain hand wheel. The pressure retaining valve is from Precision Scale with a sheet brass mount. The angle cock/air hose is from Hi-Tech. The uncoupling device was bent from brass wire.


The sill steps are etched parts from Yarmouth Model Works. The towing loop (visible below the side sill under the first pressed steel side member) is an etched part from the scrap bin, as well as the route card holder (not visible in this photo, although I will highlight in the finished model posting.) Lastly, I fashioned the top corner gussets from 0.005" styrene.

I will bring this finished model to the upcoming NERPM meet in June.

Wednesday, November 27, 2019

Load for the McKeesport Connecting Railroad Gondola


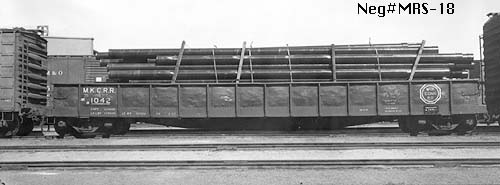
A little while back, I started work on a Funaro & Camerlengo McKeesport Connecting HO scale gondola. I have done a fair amount of work on the model since that post and will update on that in the near future. At the same time, I have been working on a pipe load for the model. The inspiration for the load is the photo shown above of a pipe load in a Mckeesport Connecting gon.

"Top" view of the load layers with four pipes over five. The top layer is at bottom

To create the load, I pulled out some straws that I "liberated" from Dunkin' Donuts years ago. I used them because they are quite rigid compared to other straws (McDonald's also has good, sturdy straws that can be used for loads.) I cut the full pieces to roughly 48 feet in length using a good paper cutter. The filler pieces are obviously shorter! If you click on the photo above of the prototype to enlarge it, you will see that the wood side pieces that help to contain the load have wire tying them together between every two layers of pipe, as well as on top. There is also banding around the entire load.


"Bottom" view of the load with five pipes visible

I built the load in three sets of two layers. The two lower layers are hollow to conserve straws as well as to provide a cavity for a weight. The bottom layer will be affixed to a sheet of 0.010" styrene. The wire between each layer will be created with black thread. The banding will be replicated with Chartpak drafting tape, 1/32" in width. The wood to contain the load will be 4x4 hardwood represented by 4x4 styrene strip. I created the load this way so that everything can be prepainted and "assembled" to simulate what is seen in the photo. The straw "pipes" were glued together with Gorilla Clear Grip adhesive. More as the model progresses...


The load loosely placed in the carbody (note that I have removed the rivets from the side of the car where the collapsible stake pockets were located, as these cars did not have the stake pockets even though the model does!)

Thursday, November 7, 2019

McKeesport Connecting Railroad 1000-series 50-foot Gondolas

ACF Industries, Hawkins/Wider/Long Collection
The McKeesport Connecting Railroad was part of the U.S. Steel family of railroads and its very modest fleet of cars reflected that affiliation. It received 100 fifty-foot gons from American Car & Foundry in 1941 that were similar to cars received by other USS roads. The cars were placed in the 1000-1099 series. They had fairly low sides, steel floors, fixed Dreadnaught ends, and fishbelly center sills, among other details. They were painted in a decidedly gray (not black) color: Scully #320 black graphite and as delivered featured a Pratt & Lambert "Vitralex" red circle as part of the company monogram.


The cars did have some unusual details, many of which are called out in the graphical photo overlay above. Note the grab arrangement in the in service photo below.

John W. Barriger National Railroad Library flickr site, TRRA of St. Louis album
Funaro & Camerlengo offers HO scale resin model kits for these cars. There are a few details that need to be addressed/corrected for an accurate model:

  • Grab iron mounting arrangements at corners of sides and ends (note that these were simplified for many cars by the early to mid-1950s; scratchbuild on model)
  • USS-style towing loop/jacking pads and route card holders (spare etchings from Speedwitch B&LE box car kit)
  • Universal 5700 XL power hand brake with M1704 wheel (from Intermountain covered hopper kit)
  • Collapsible stake pockets (model includes them; prototype did not have them; will model a car with a load to hide interior, but must remove rivets from exterior of sides)
  • Red circle in the as-built scheme (small custom decal project!)
I will highlight the modeling of a car in coming posts. Here are photos of my model in its current state (not very far along!):
Reservoirs and AB valve installed and piped with 0.010" wire
Floor glued in place; not collapsible stake pockets (not correct for this prototype)
Etchings for towing loops/jacking pads and route card holders

Other photos:
MKCRR 1029 - Ed Wilkommen Collection of Lake States Railway Historical Association - note replacement Equipco hand wheel
MKCRR 1042 - Jack Whitmeyer Collection (small image)

I plan to bring this to Cocoa Beach as a finished model, including pipe load

BIG thank you to Ed Hawkins for his help with the prototype information